
Cabled Sedona Pumpkin [Knitting Pattern]
If you’re a bit bored by traditional pumpkin knits, grab a cable needle and a skein of variegated yarn in your favorite colors and work up the Cabled Sedona Pumpkin!
Cabled Sedona Knitting Pattern | Plumpkin Pumpkin Knitting Pattern | Sugar Baby Pumpkin Hat Knitting Pattern
Download Pattern PDF | Add to Ravelry Queue | Pin on Pinterest
Cabled Sedona Pumpkin
Knitting Pattern
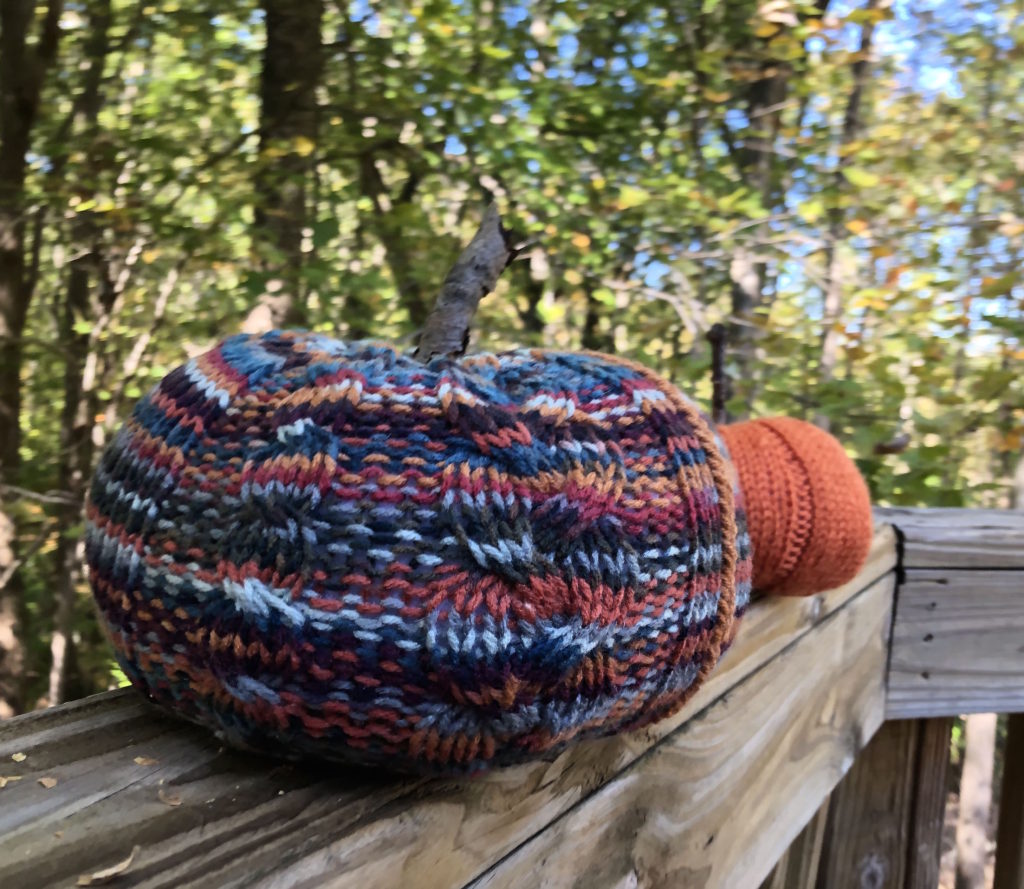
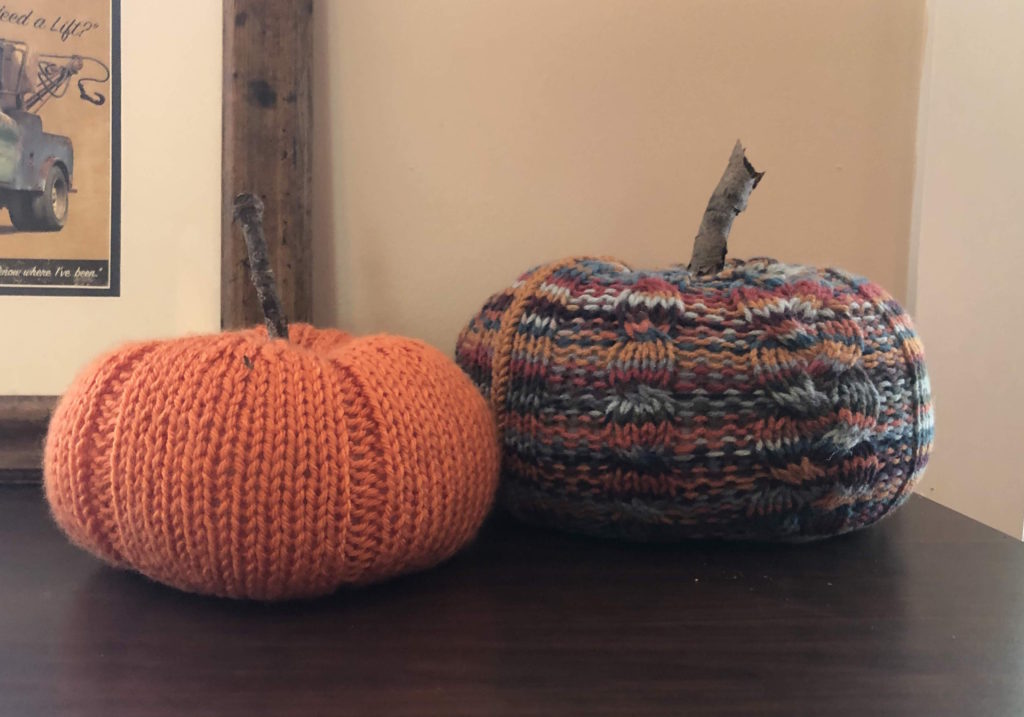
The Cabled Sedona Pumpkin Knitting Pattern is a fun twist on the traditional knitted pumpkin pattern. The cables make this home décor gourd interesting to knit and a pleasure to behold! After all, not all pumpkins are orange.
To view our terms of use for all knitting and crochet patterns, see our Terms of Service.

Materials
Yarn:
200 yards of medium weight yarn
[pictured yarn is Red Heart Hello Gorgeous in Sedona]
Needles:
US #8/5.00 mm
dpn (or long circulars, if using magic loop method)
Notions:
cable needle
fiber fill
finishing needle
stick (for stem)
stitch marker (1)
Notes
Gauge:
unimportant
Abbreviations
BO – bind off
CO – cast on
k – knit
m – marker
p – purl
PM – place marker
C4F – cable 4 front; slip 2 stitches onto cable needle and hold in front, knit 2 stitches, knit 2 stitches from the cable needle
C6B -cable 6 back; slip 3 stitches onto cable needle and hold in back, knit 3 stitches, knit 3 stitches from cable needle
C6F – cable 6 front; slip 3 stitches onto cable needle and hold in front, knit 3 stitches, knit 3 stitches from cable needle
Pattern
The pumpkin is worked from top to bottom in the round.
Setup
CO 84 sts and join in the round, taking care not to twist.
Knit 1 round.
Body
The body is worked in a 24-round pattern. (The pattern is divided below to help with readability.)
1 – *p3, k9, p3, k6, p3, k4*
2 – work stitches as they present (knit the knit stitches and purl the purl stitches)
3 – *p3, C6F, k3, p3, k6, p3, k4*
4 – work stitches as they present
5 – *p3, k9, p3, k6, p3, C4F*
6 – work stitches as they present
7 – *p3, k3, C6B, p3, k6, p3, k4*
8 – work stitches as they present
9 – work stitches as they present
10 – work stitches as they present
11 – *p3, C6F, k3, p3, k6, p3, C4F*
12 – work stitches as they present
13 – work stitches as they present
14 – work stitches as they present
15 – *p3, k3, C6B, p3, k6, p3, k4*
16 – work stitches as they present
17 – *p3, k9, p3, k6, p3, C4F*
18 – work stitches as they present
19 – *p3, C6F, k3, p3, k6, p3, k4*
20 – work stitches as they present
21 – work stitches as they present
22 – work stitches as they present
23 – *p3, k3, C6B, p3, k6, C4F*
24 – work stitches as they present
Work these 24 rounds twice more for a total of 72 cable pattern rounds.
Knit 1 round, then BO.
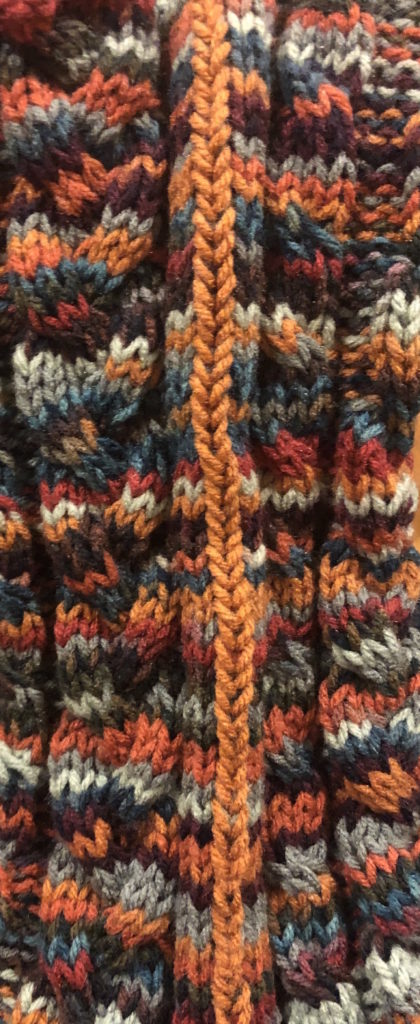
Duplicate Striping
To enhance the shape of your pumpkin, cut a length of orange yarn from the skein and work a duplicate stitch up the center of the stockinette stitch panel.
(Note that the pumpkin was worked from top to bottom, so the “center stitch” is actually half a stitch from the each of the third and fourth knit stitches.)

insert at the bottom of the “v”
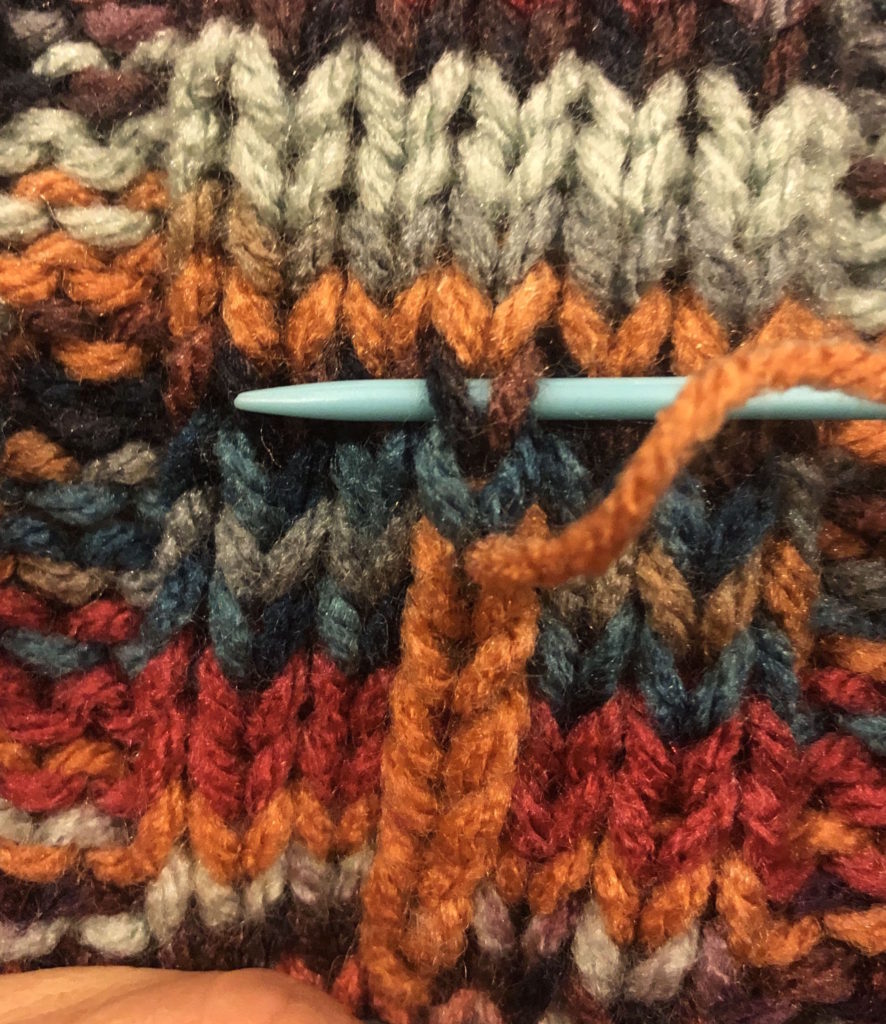
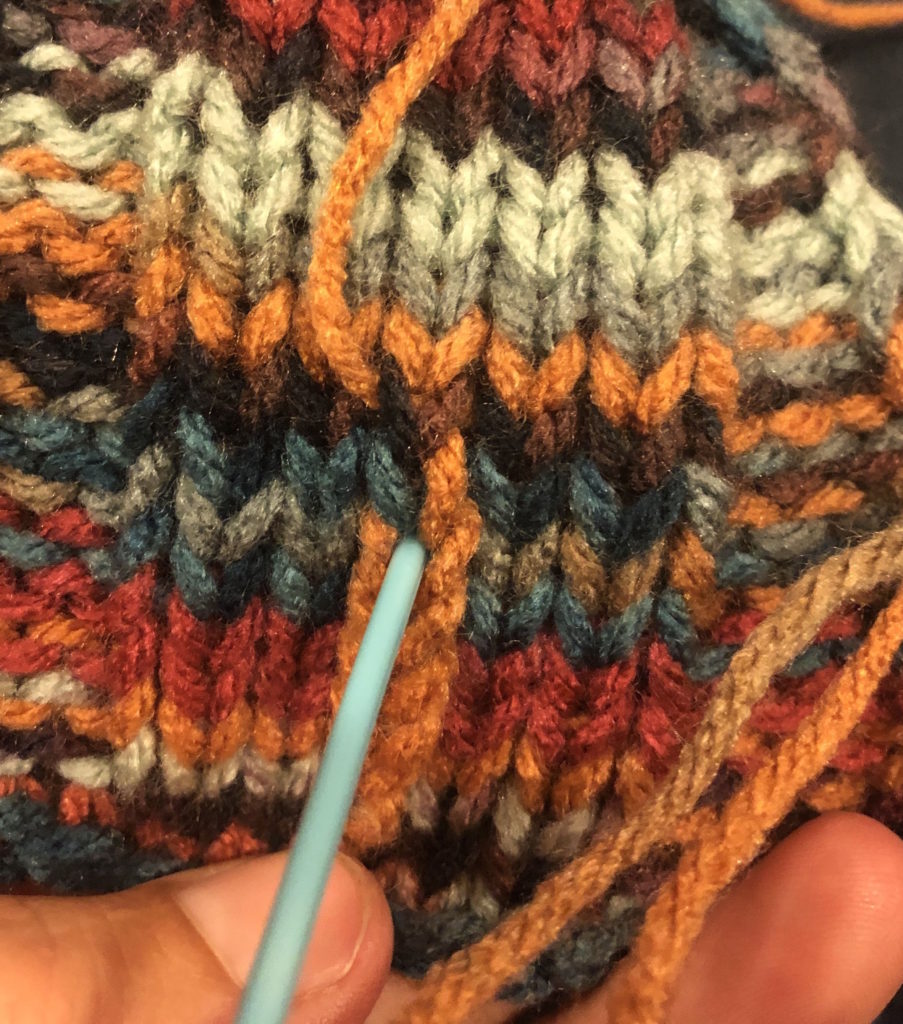
insert at the origin point
Duplicate stitch is intended to be invisible, but I gave each stitch a bit of a tug to make the stripe really pop.
Finishing
Fold over the pumpkin with the right side out, matching the top of each cable to the bottom.
Stitch the top to the bottom, leaving a hole about 4″ wide. (These stitches need not be perfect as they will not show, but they do need to hold securely.)
Stuff the pumpkin. It will resemble a donut.
Sew the 4″ seam. Weave in remaining end.
Invert the pumpkin so that the seam is in the center and not visible. Massage the pumpkin into the desired shape.
Slide the stem into the center hole. When stuffed, the pumpkin will hold its stem upright.
Download Pattern PDF | Add to Ravelry Queue | Pin on Pinterest
2 Comments
Pingback:
Pingback: