
Swivel Hat [Knitting Pattern]
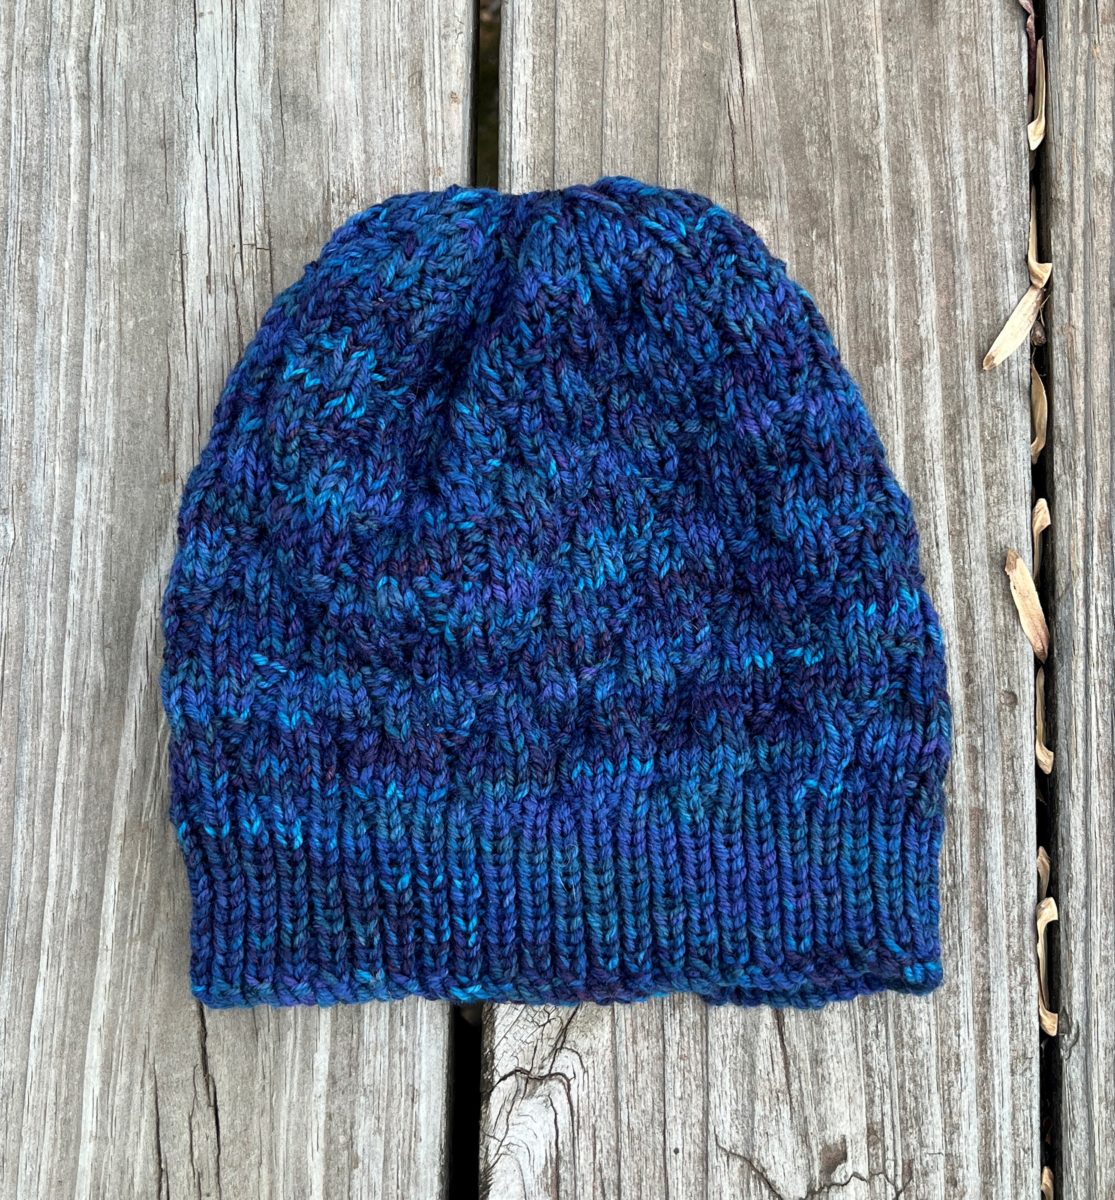
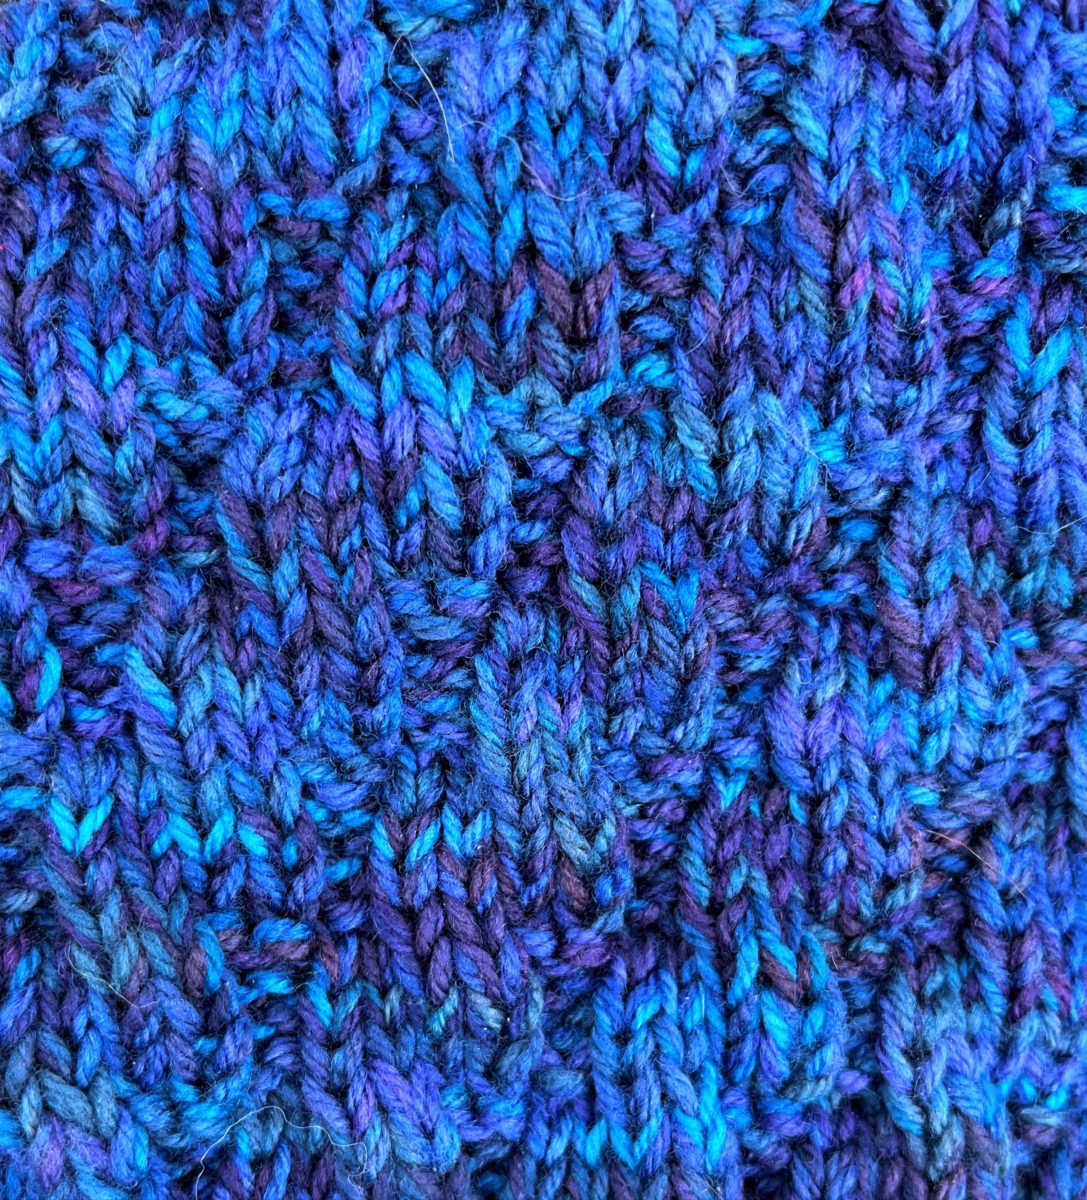
The Swivel Hat uses simple combinations of knits and purls to create faux cable twists for a beautiful allover stitch pattern.
Download PDF | Add to Ravelry Queue | Pin on Pinterest
Swivel Hat
Knitting Pattern
The Swivel Hat is a simple cap with a beautiful allover stitch pattern that is suitable for variegated and solid colorways. The pattern looks like it is made up of small, cabled twists, but requires no cabling!
The Swivel Hat knitting pattern is worked in the round with knits, purls, and decreases (ssk, k2tog, p2tog). It is suitable for an advanced beginner.
To view our terms of use for all knitting and crochet patterns, see our Terms of Service.
Sizes
23″ circumference, 8″ tall
Materials
Yarn:
1 skein of KnitPicks Hawthorne yarn in Springwater
or
350 yards of your choice of fingering weight yarn
Needles:
US #6/4.00mm
US #8/5.00mm
Notions:
finishing needle
pompom (optional)
stitch markers
Notes
Gauge:
16 sts x 20 rounds = 4″ x 4″
in Stockinette Stitch
with fingering weight yarn held double
on US #8/5.00mm needles
Abbreviations
BO – bind off
CO – cast on
k – knit
k2tog – knit 2 stitches together; single right-leaning decrease
p – purl
pm – place marker
p2tog – purl 2 stitches together; single decrease
ssk – slip 2 stitches knitwise, knit these 2 stitches together through back loops; single left-leaning decrease
st(s) – stitch(es)
Setup
With US #6 needles and yarn held double, CO 96 sts, pm, and join in the round, taking care not to twist.
Work in k1, p1 rib until brim measures 2.5″ from cast-on edge.
Body
Change to US #8 needles and work the body as follows:
Rounds 1 to 4 – *k4, p2*
Rounds 5 to 8 – k2, *p2, k4* until 4 stitches remain, k4
Rounds 9 to 12 – *p2, k4*
Repeat these 12 rounds until your work measures 7″ from the cast-on edge, ending with Round 11.
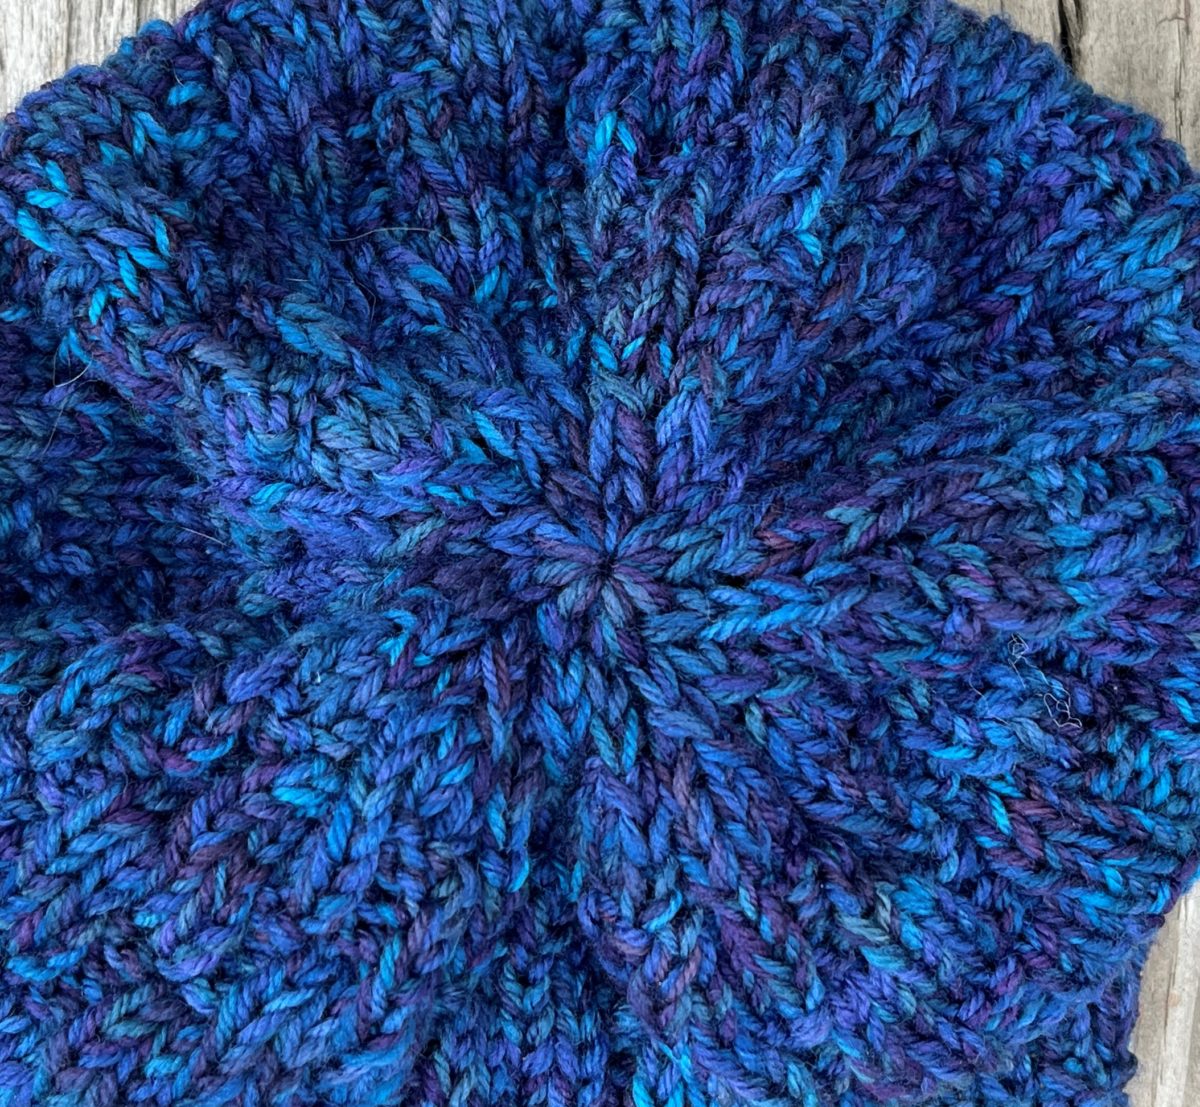
Crown Shaping
Round 1 – *p2, k2, k2tog* [80 sts]
Rounds 2 to 4 – *k3, p2*
Round 5 – *ssk, k1, p2* [64 sts]
Round 6 – *ssk, p2tog* [32 sts]
Round 7 – *ssk* [16 sts]
Round 8 – *ssk* [8 sts]
Finishing
Snip yarn, leaving a long tail. Draw through remaining stitches, pull tight, and secure.


4 Comments
Judy Skailes
i don’t have a web site
Holly
Do you have a question about the pattern, Judy?
marion shorter
are you sure rounds 5-8 are correct,,,,,,there seems to be too many stitches
Holly
Thank you! It should end k4 (so there were too few stitches). I apologize for the typo.