
Knitted Lace Hearts [Knitting Stitch]
My youngest daughter, the middle child of three, loves girly things. I’m not exactly sure where that comes from, but we roll with the sparkles, unicorns, hearts, and, of course, all the pink. Since she’s the most fashion-conscious of my kids and still fairly small, knitting for her tends to be quite fun. Most recently, I’ve added knitted lace hearts to some basic tops.
It’s worked out beautifully on a tunic top and a sweater with ribbing, and due to its versatility, could probably be added to your favorite top, too!
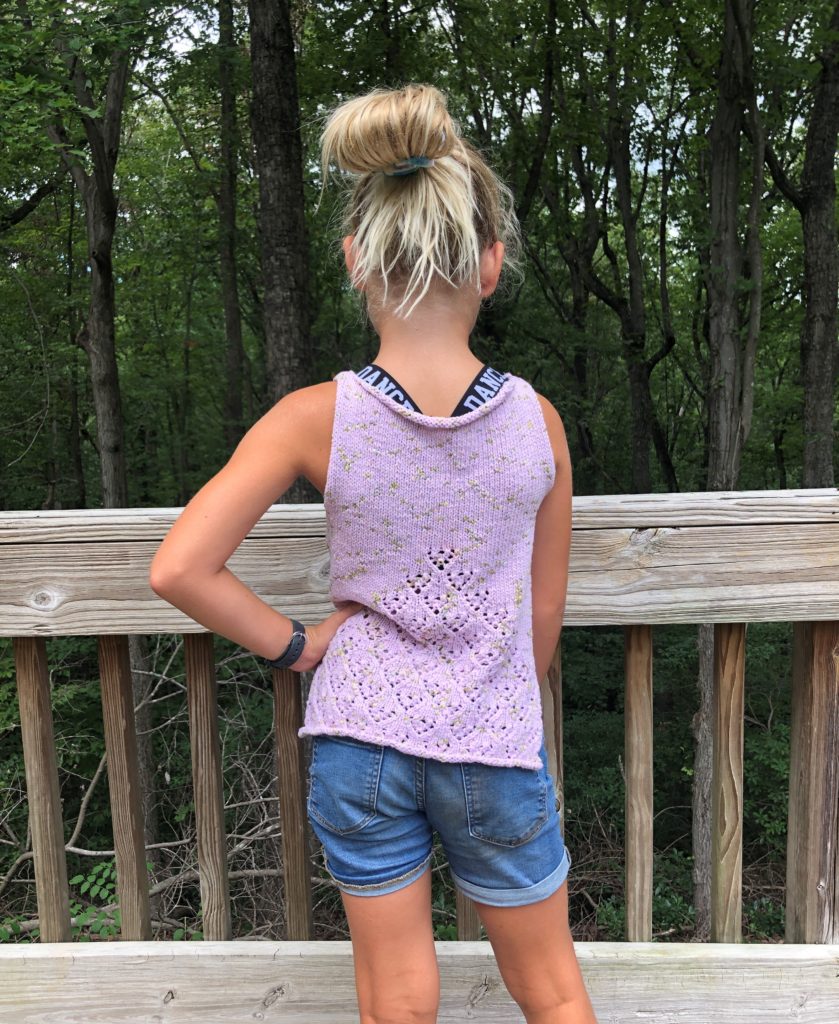
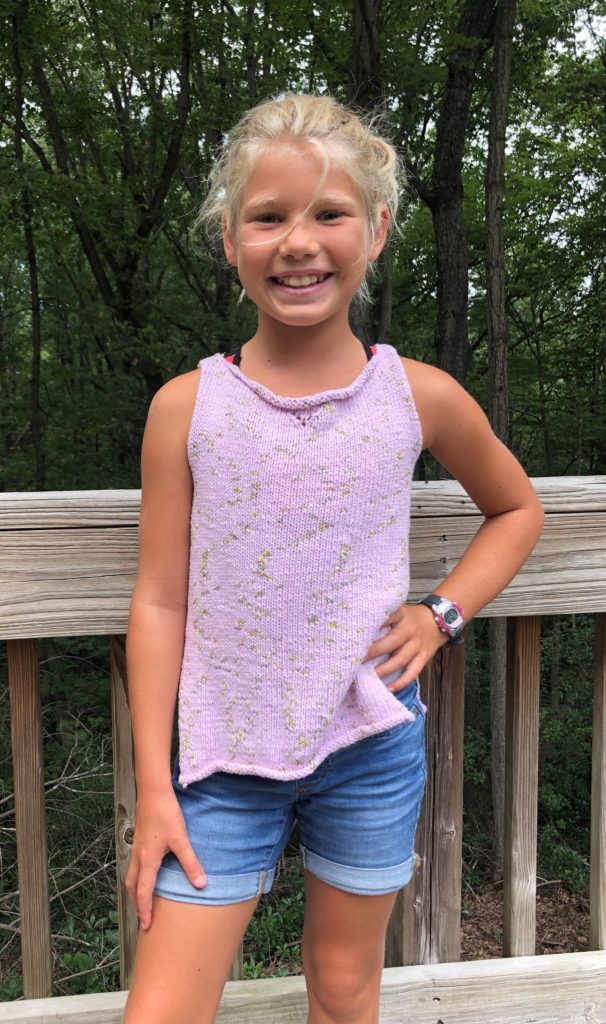
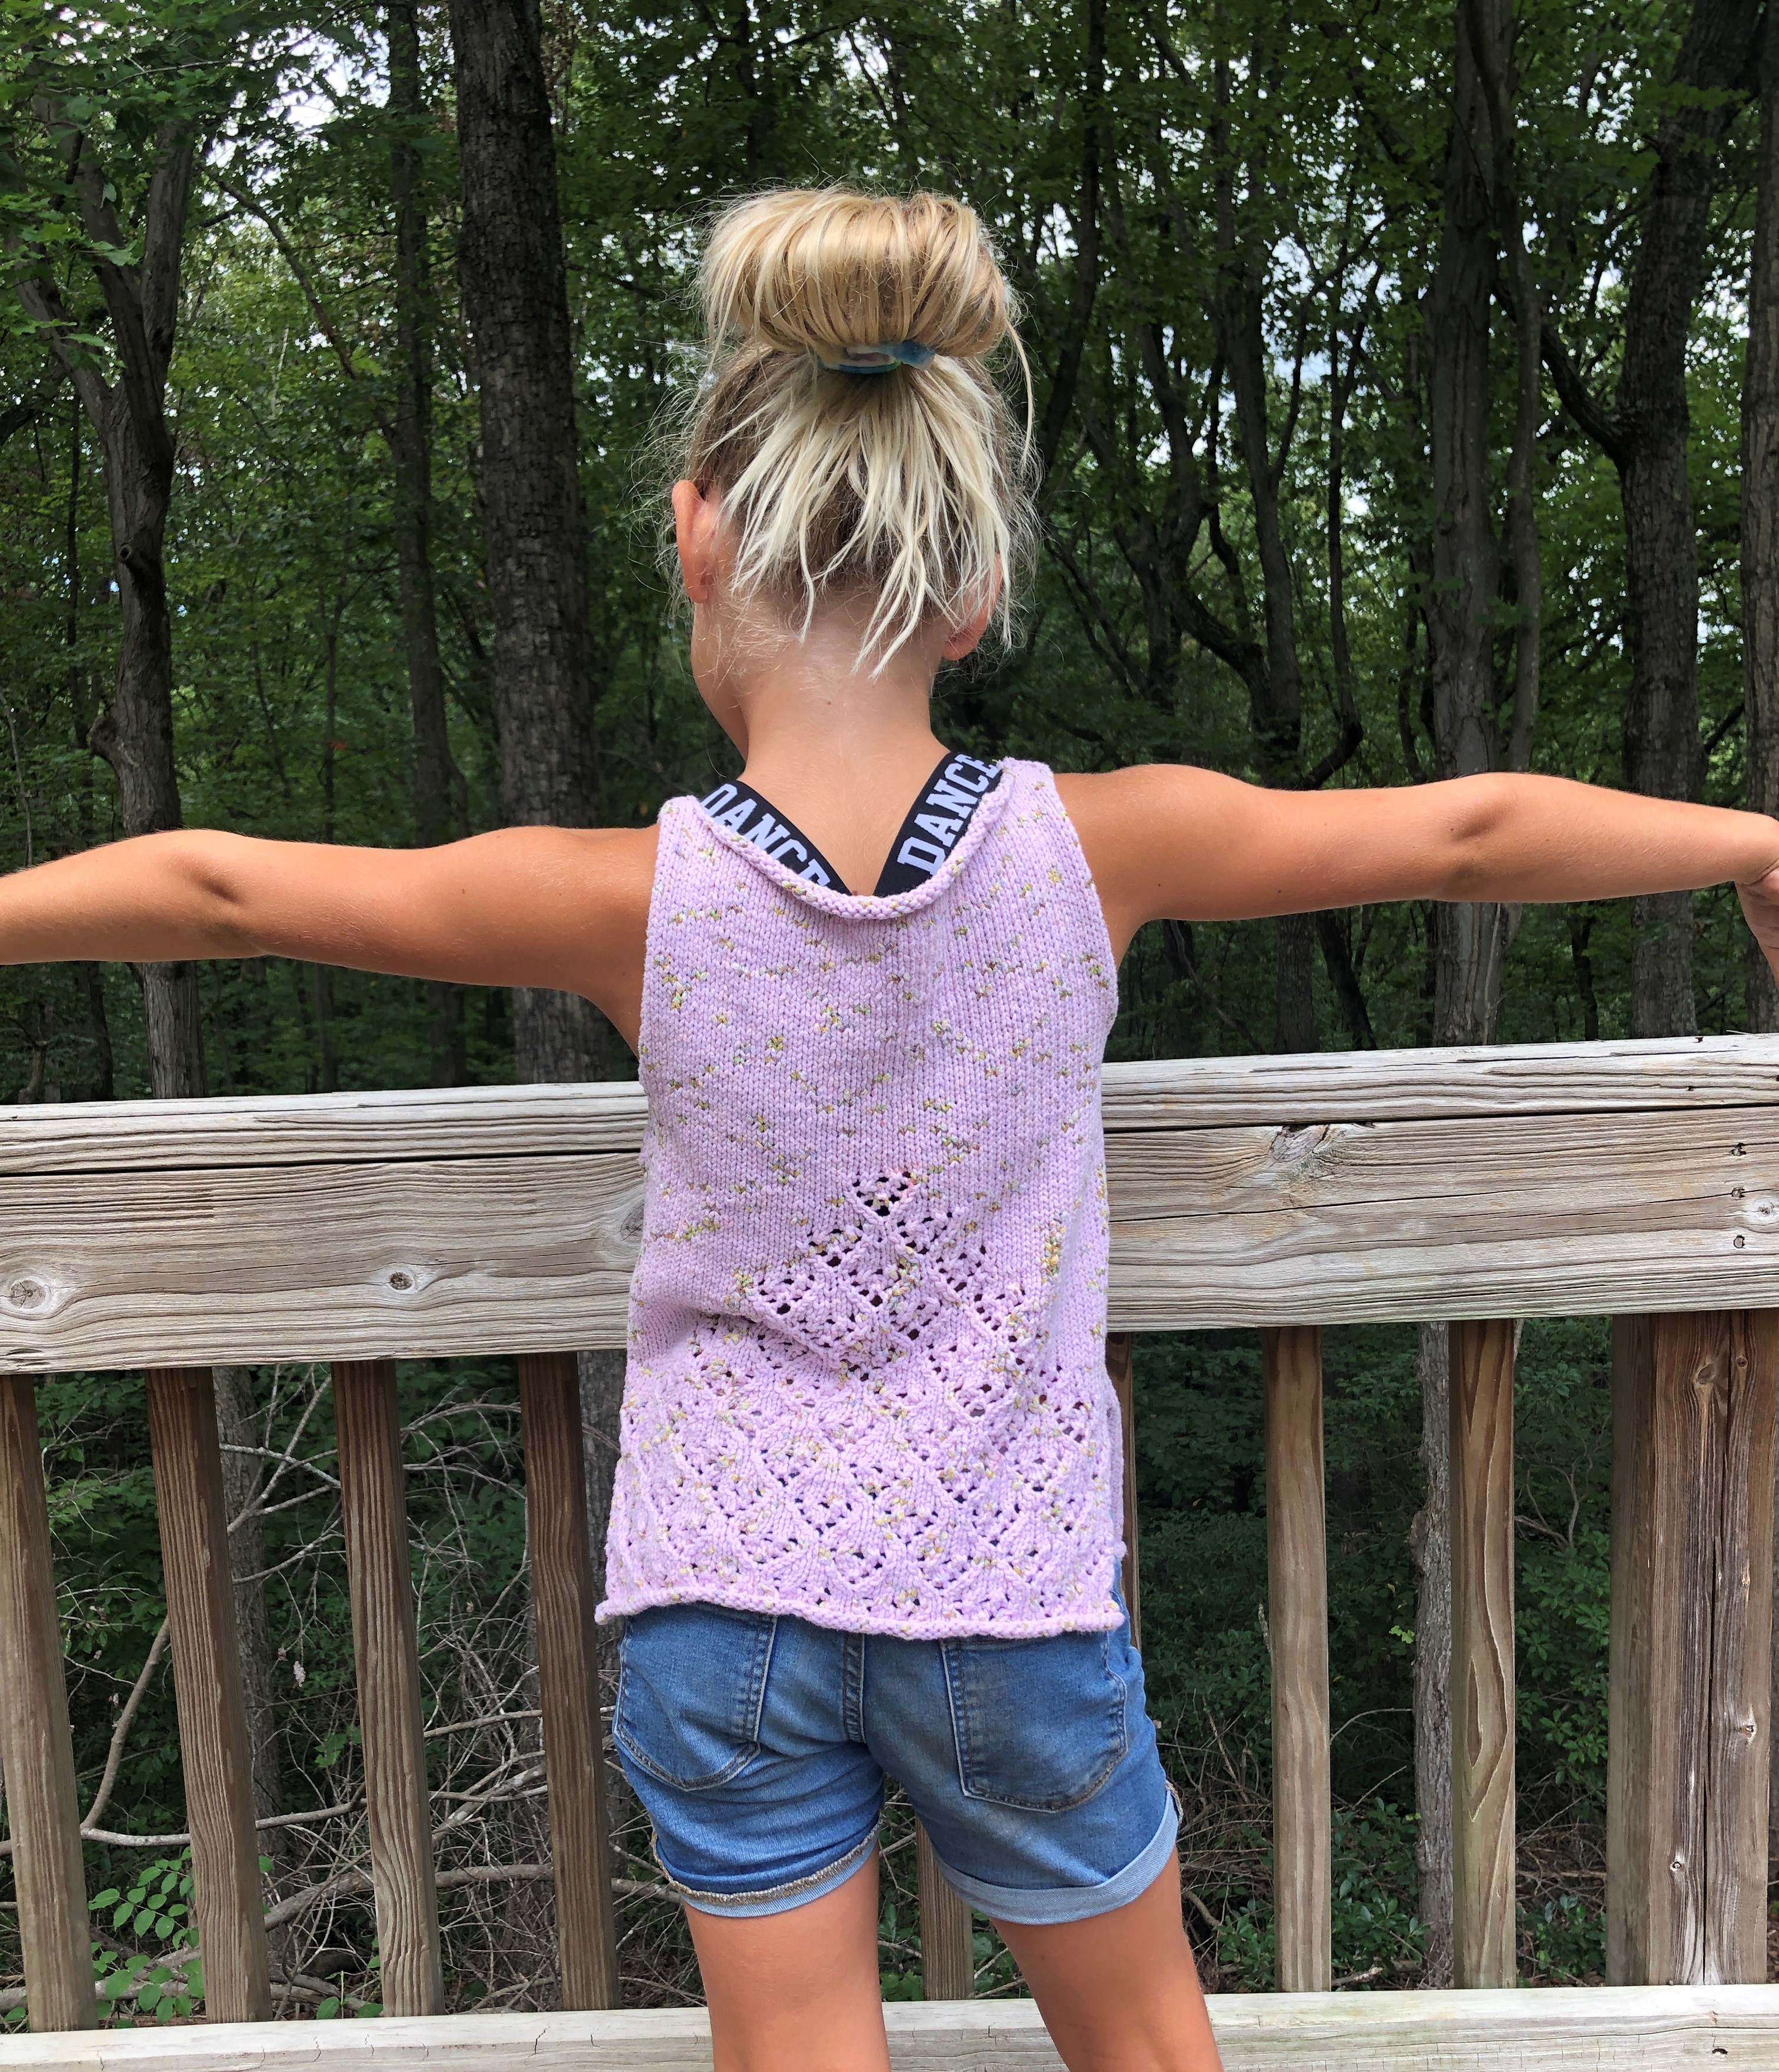
Heart Lace Tunic Top
Yarn: Lion Brand Summer Kiss in Quartz
I improvised this top based on my daughter’s measurements. It is constructed from the bottom up, beginning with separate panels worked flat, then later joined in the round. I worked knitted lace hearts up from the back in a point. There is also a heart on the center front at the breastbone. The tunic is worked in Stockinette stitch without edging and had a tendency to curl, even around the lacework.
This top was made with Lion Brand Summer Kiss yarn in Quartz. This yarn is a blend of 80% cotton and 20% polyester. It has the firmer drape you’d expect from a cotton yarn, yet it is soft to the touch.
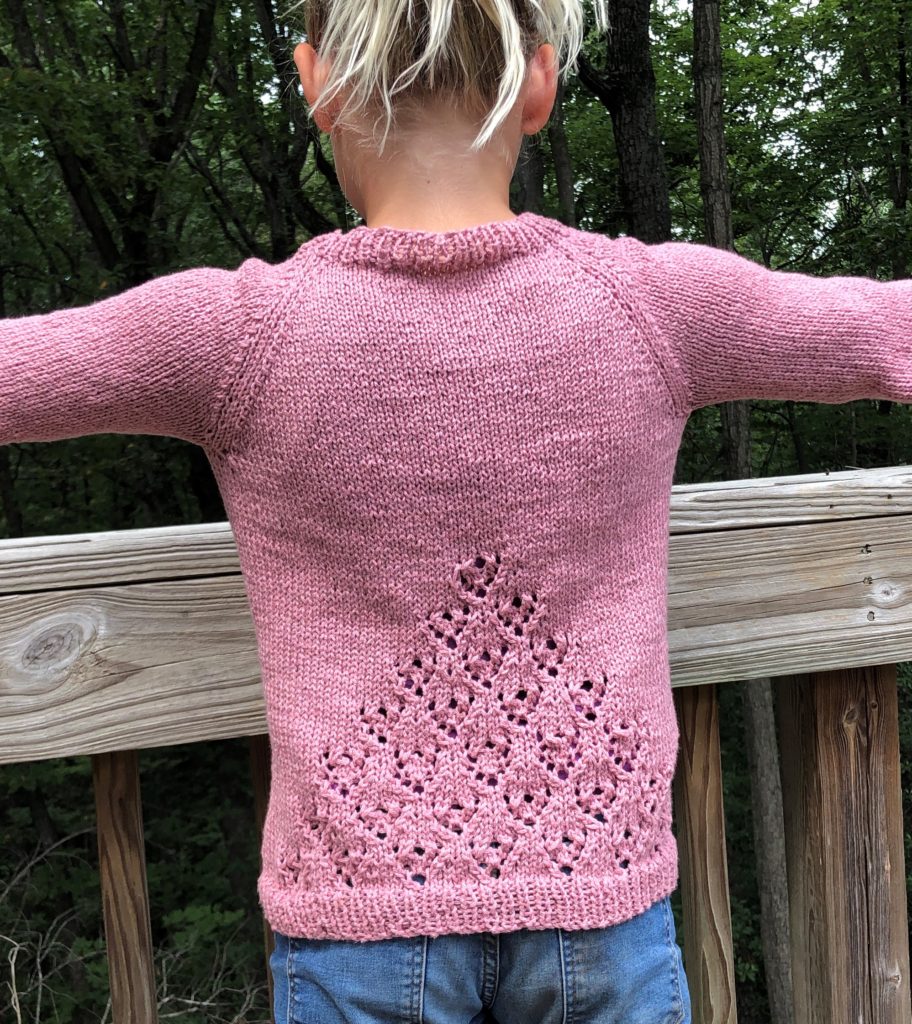

Heart Lace Pullover
Yarn: Lion Brand Low Tide yarn in Cove
The stitches for this simple bottom-up pullover were calculated using Ann Budd’s The Knitter’s Handy Book of Sweater Patterns. The edging is K1P1 ribbing and the remainder of the sweater is worked in Stockinette stitch.
This top was made using Lion Brand Low Tide yarn in Cove. A blend of 81% acrylic/19% polyester, this yarn was lightweight and had more drape than Summer Kiss. I worked these knitted lace hearts in the same decreasing triangle. This heart lace panel also held true next to the ribbing. Thank goodness it didn’t bunch or buckle!
Build It Up!
The only “catch” is that this lace is worked from the bottom up and the slopes of increases and decreases just don’t look as good worked from the top down.
Most of my go-to patterns for clothing are constructed from the top down, so I purposefully chose top-down patterns to showcase it. If you want to incorporate this lace into top-down patterns, you can work the lace portion separately and grafting it to the top-down portion. (If you’re really adventurous, you could also attempt to invert your favorite patterns completely.)
How Many Knitted Lace Hearts?
Heart lace is worked across 8 stitches over 8 rows/rounds.
To incorporate the panel, I isolated the center 64 stitches of the back of each garment. Across these 64 stitches, I worked the first 8 rows/rounds, resulting in 1 row of 8 lace hearts.
Next, I reduced the stitches on either side of the isolated lace section and worked those 8 rows/rounds again. The result is a heart lace panel that narrows on as it climbs up the back of the garment.
The total width and height of your panel will depend on the gauge of your project. With an adult garment and finer yarn, you may find that you need to use additional stitches and work several more repeats to achieve the same look.
I found the gauge consistent with Stockinette stitch, which also provided a beautiful, smooth backdrop for the lace.
Abbreviations
BO – bind off
CO – cast on
k – knit
k2tog – knit 2 stitches together; single right-leaning decrease
k3tog – knit 3 stitches together; double right-leaning decrease
m – marker
p – purl
pm – place marker
RS – right side
sm – slip marker
ssk – slip 2 stitches knitwise, knit these 2 stitches together through back loops; single left-leaning decrease
st(s) – stitch(es)
WS – wrong side
yo – yarn over
Lace (Worked Flat)
Use stitch markers (2) to isolate the lacework area on the body of your garment. The lacework should be centered on your garment in multiples of 8 stitches.
Follow these instructions for the stitches you have isolated for lacework. Other stitches should be worked as your original pattern indicates.
Row 1 – k to m, sm, *k4, yo, ssk, k2* to m, sm, k to the end
Rows 2, 4, and 6 – p all, slipping markers as you pass them
Row 3 – k to m, sm, *k2, k2tog, yo, k1, yo, ssk, k1* to m, sm, k to end
Row 5 – k to m , sm, *k1, k2tog, yo, k3, yo, ssk* to m, sm, k to end
Row 7 – k to m , sm, *k2, yo, ssk, yo, k3tog, yo, k1* to m, sm, k to end
Row 8 – p to m, remove marker, p4, pm, p to 4 sts before m, remove marker and place in current position, p to the end of the row
Row 8 reduces the size of the lacework panel by 8 stitches total by bringing in the panel by 4 stitches on each side.
Work these 8 rows 7 times. On Row 8 of the last repeat, remove all markers.
Lace (In the Round)
Use stitch markers (2) to isolate the lacework area on the body of your garment. The lacework should be centered on your garment in multiples of 8 stitches.
Follow these instructions for the stitches you have isolated for lacework. Other stitches should be worked as your original pattern indicates.
Round 1 – k to m, sm, *k4, yo, ssk, k2* to m, sm, k to the end
Rounds 2, 4, and 6 – k all, slipping markers as you pass them
Round 3 – k to m, sm, *k2, k2tog, yo, k1, yo, ssk, k1* to m, sm, k to end
Round 5 – k to m , sm, *k1, k2tog, yo, k3, yo, ssk* to m, sm, k to end
Round 7 – k to m , sm, *k2, yo, ssk, yo, k3tog, yo, k1* to m, sm, k to end
Round 8 – k to m, remove marker, k4, pm, k to 4 sts before m, remove marker and place in current position, k to the end of the round, slipping both MA markers as you pass them
Round 8 reduces the size of the lacework panel by 8 stitches total by bringing in the panel by 4 stitches on each side.
Work these 8 rows 7 times. On Round 8 of the last repeat, remove all markers.
Share Your Work
If you add this lacework to a project, please share it! I would love to see how you used it.

One Comment
Pingback: