
Purl Swirl Hat [Knitting Pattern]
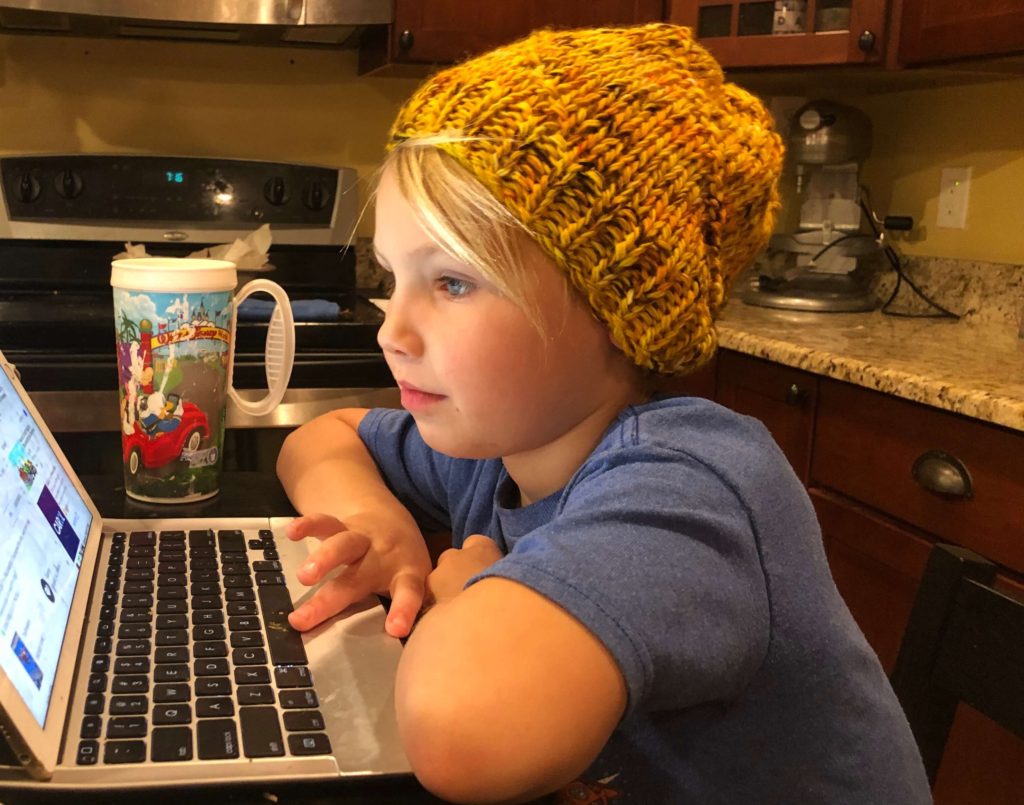
The Purl Swirl Hat originated when I tired of making plain hats. I wanted something that popped a little more. And I love this clean and simple hat that fits that bill!
Download Pattern PDF | Add to Ravelry Queue | Pin on Pinterest
Purl Swirl Hat
Knitting Pattern
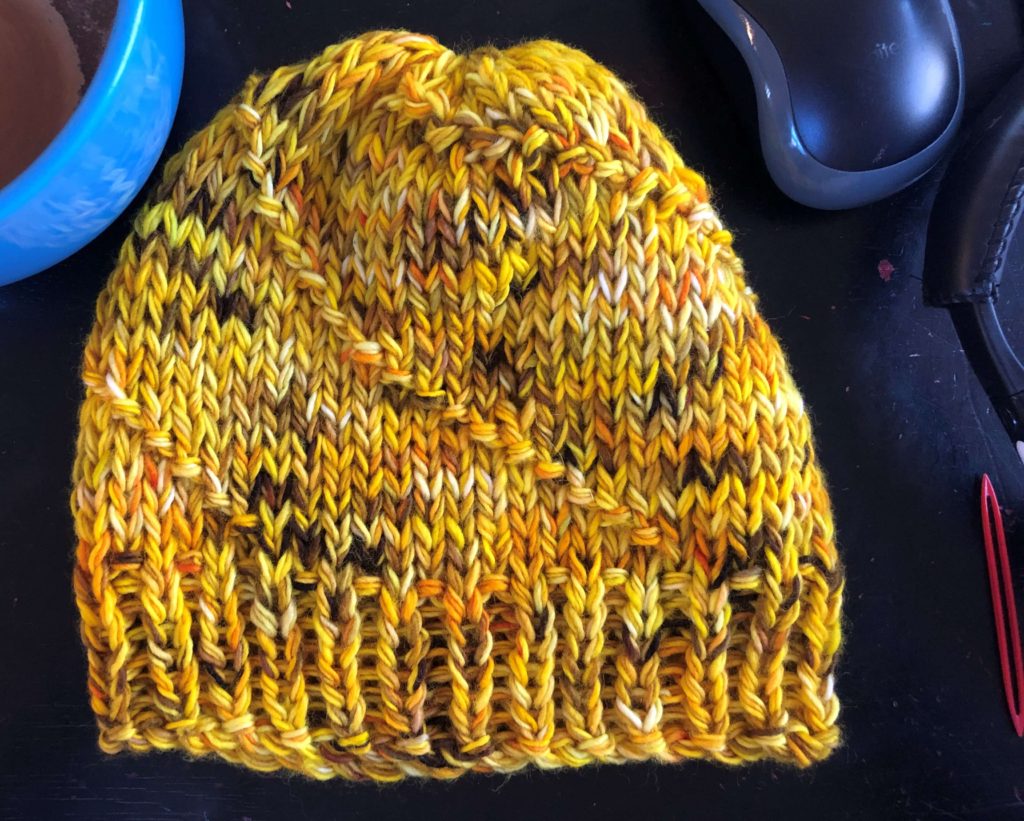
The Purl Swirl Hat Knitting Pattern is an easy-to-follow classic hat pattern with a swirl of purls. This project is suitable for an advanced beginner.
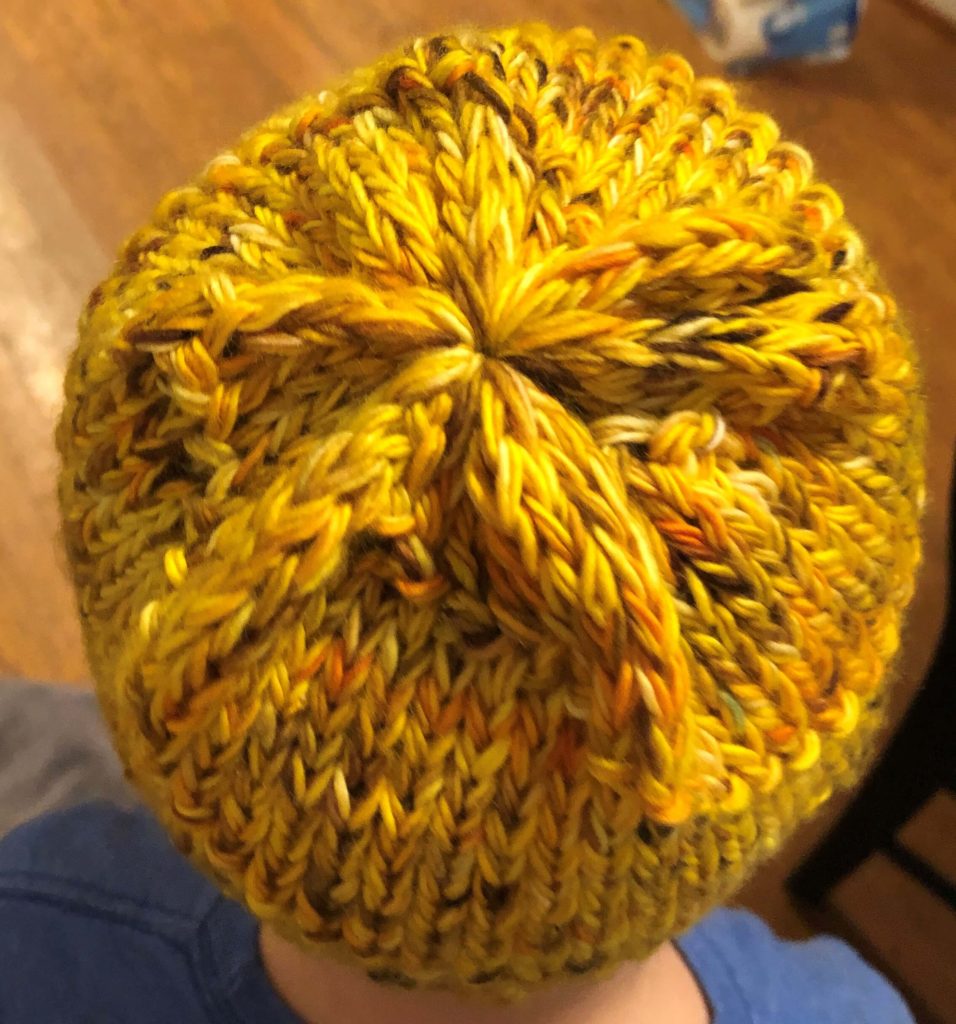
One thing that I’m particularly proud of is being able to work the decreases into the swirl pattern. They are nearly invisible.
There are also zero stitches to bind off when finishing! It can be a cumbersome process, especially with chunky needles, so we’re just going to skip it altogether.
To view our terms of use for all knitting and crochet patterns, see our Terms of Service.
Yarn Notes
This hat can be made with a single skein of sock yarn or any other fingering-weight yarn! It’s a great stash-buster.
This mustard colorway is from my own hand-dyed collection.
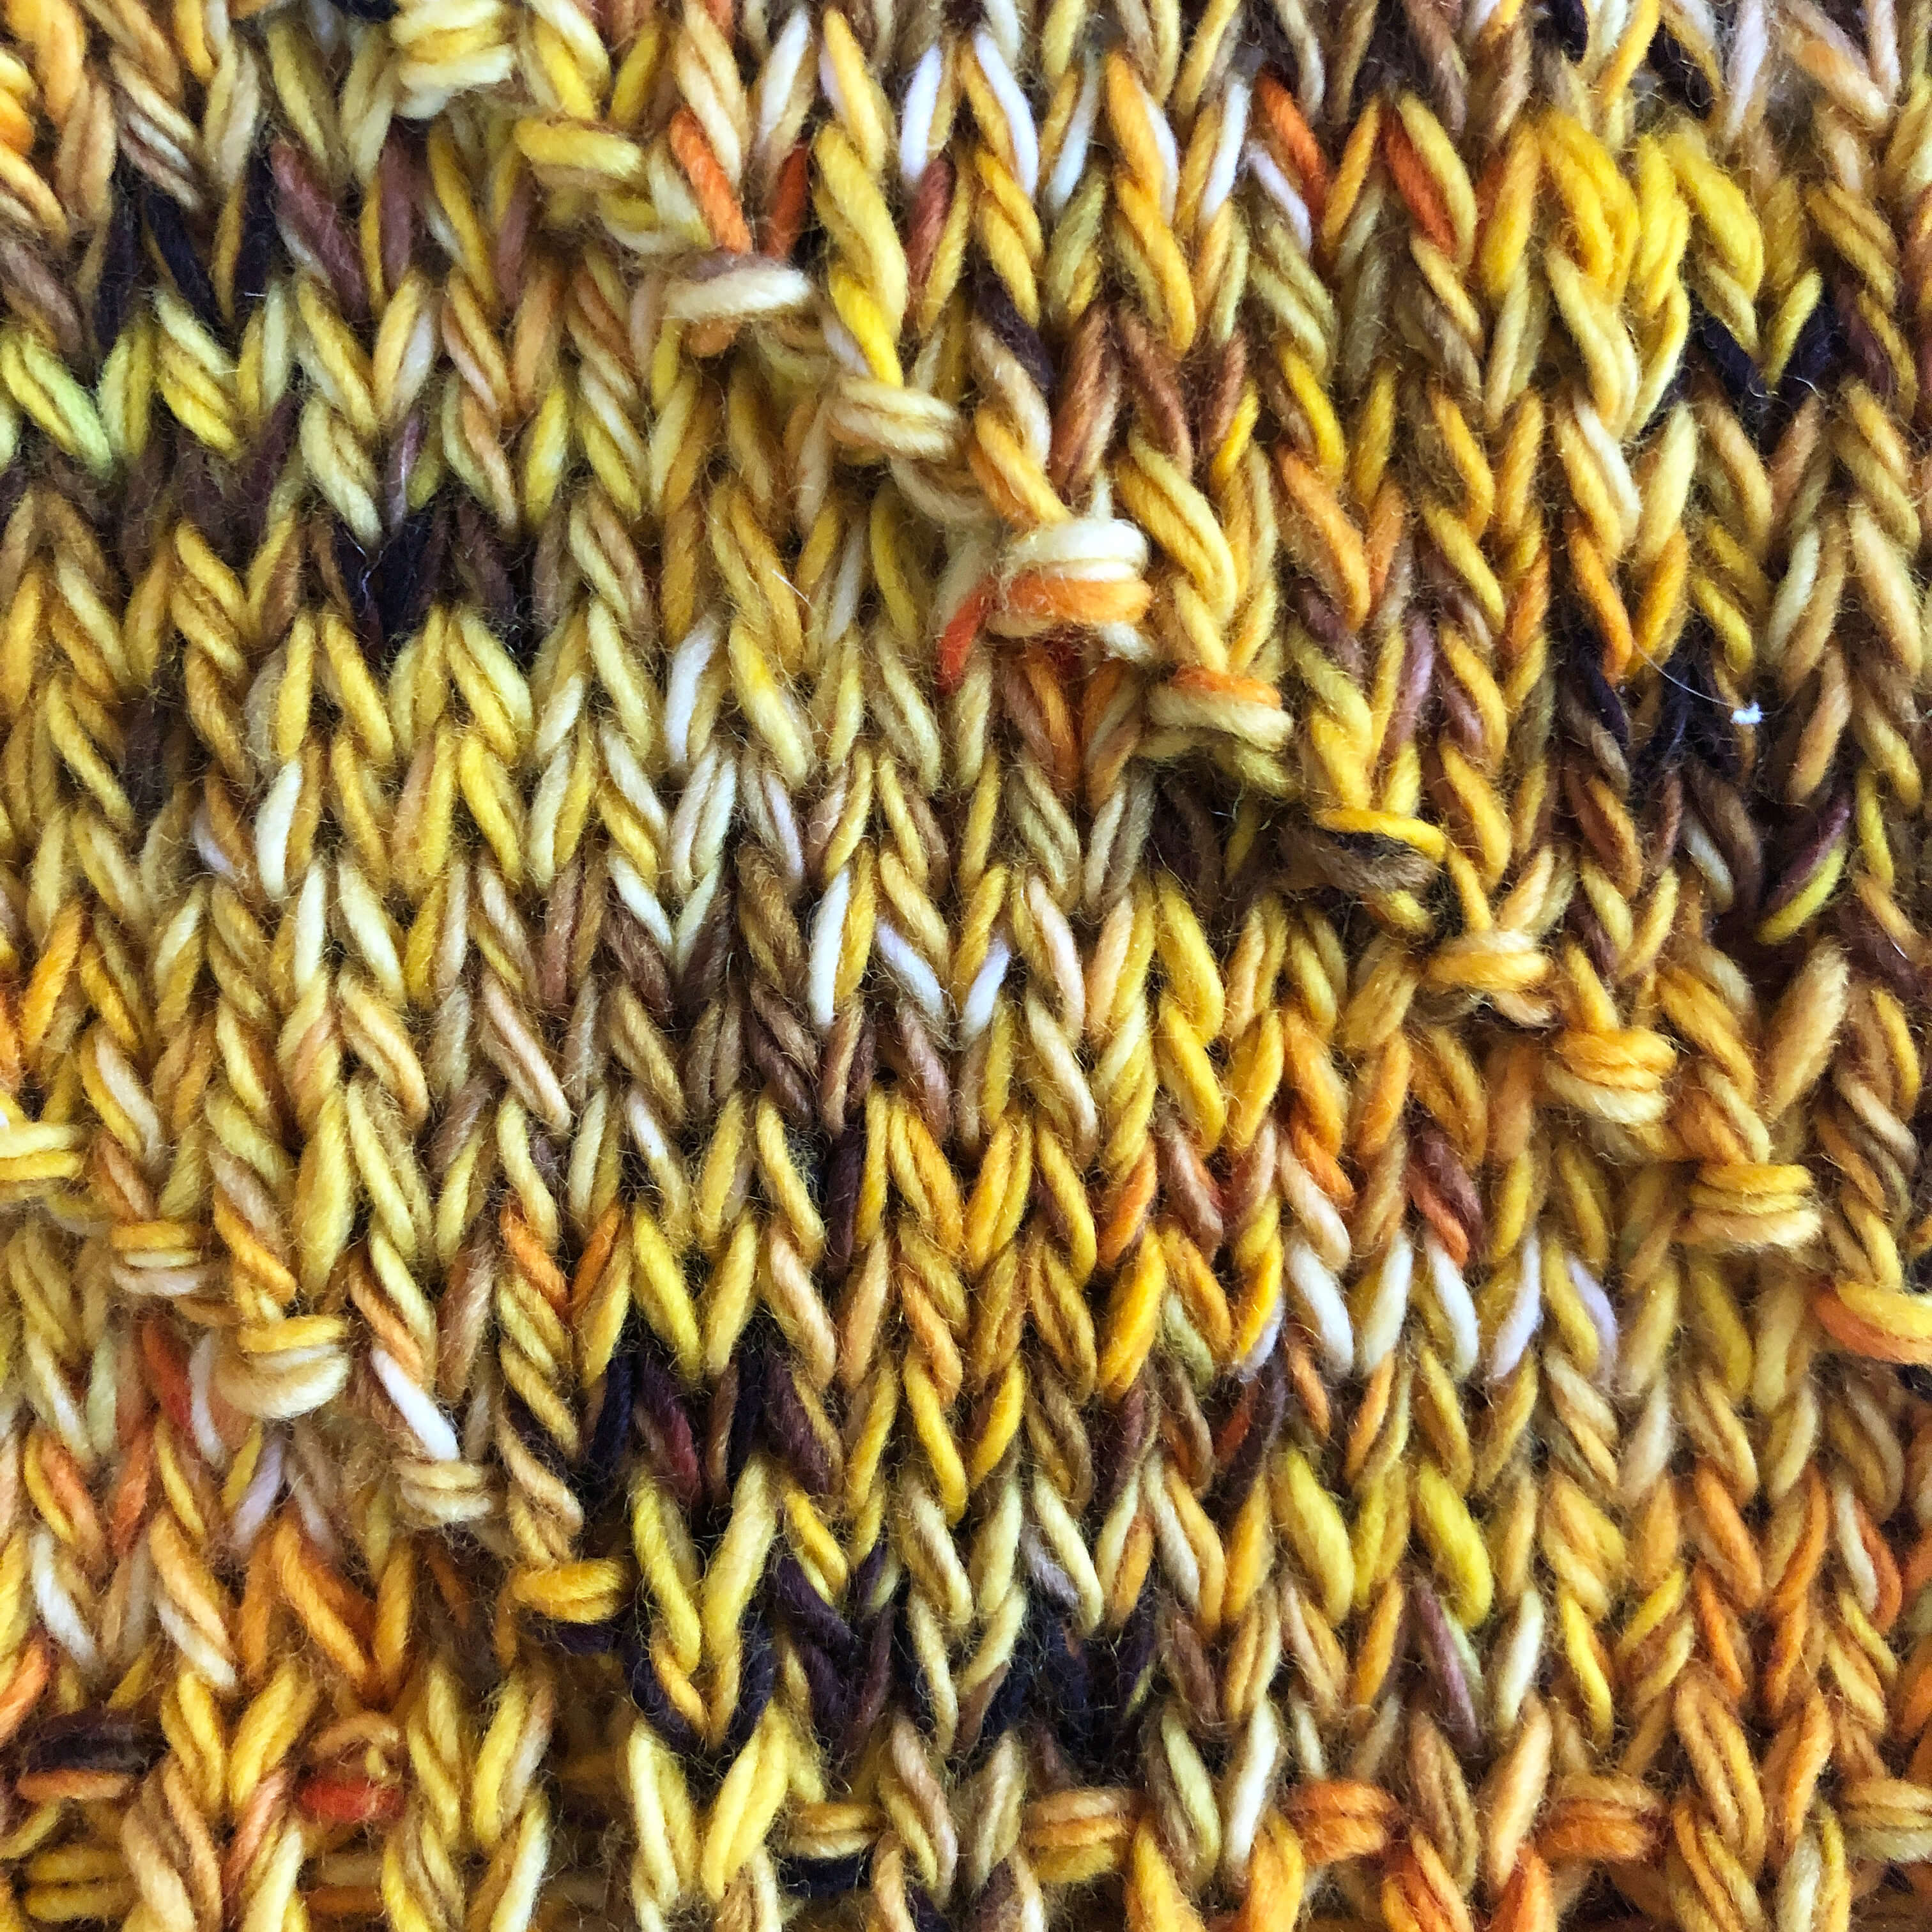
When choosing a yarn, keep in mind that the purl swirl shows up best when your yarn is lighter in color. Filament by Deep Dyed Yarns (below in colorway Calling Birds) is a breathtaking yarn, but probably wasn’t the right one for this pattern.

While the pattern also shows up particularly well in solid colors, I prefer the look of variegated yarn when chain plying.
Here are some other yarns that will work well with this pattern:
Hanks & Hookers Fingering
Knit Picks Stroll
Malabrigo Sock
Seek out a skein from your favorite local dyer or LYS!
Sizes
Finished sizes:
S – 18″ around, 7″ tall
M – 20″ around, 8″ tall
L – 22″ around, 9.5″ tall
Instructions are provided for all three sizes in pattern as S (M, L)
Materials
Yarn:
1 skein of fingering weight yarn (~100g/400 yds)
Needles:
US #13/9.00 mm
Notions:
finishing needle
stitch marker (1)
Notes
Gauge:
12 sts x 16 rounds = 4″ x 4″
in Stockinette Stitch with yarn held tripled
Abbreviations
BO – bind off
CO – cast on
k – knit
kwise – knitwise
LHN – left hand needle
p – purl
pm – place marker
p2tog – purl 2 stitches together; single decrease
pwise – purlwise
sl – slip
st(s) – stitch(es)
Pattern
The Purl Swirl Hat uses fingering-weight yarn held tripled. I achieved this by using the technique of chain plying. It triples the yarn straight from the skein while working it, reducing preparation time. This technique can be learned quickly and easily.
If you do not wish to learn chain plying, substitute the fingering-weight yarn with a bulky-weight yarn of your choosing.
Setup
With fingering weight yarn held tripled, CO 52 (64, 78) sts, pm, and join in the round, taking care not to twist.
Work in k1, p1 rib for 1.5″ (1.5″, 2″).
Body
Begin working in the purl swirl pattern as follows:
Round 1 – *p1, k12*
Round 2 – *k1, p1, k11*
Round 3 – *k2, p1, k10*
Round 4 – *k3, p1, k9*
Round 5 – *k4, p1, k8*
Round 6 – *k5, p1, k7*
Round 7 – *k6, p1, k6*
Round 8 – *k7, p1, k5*
Round 9 – *k8, p1, k4*
Round 10 – *k9, p1, k3*
Round 11 – *k10, p1, k2*
Round 12 – *k11, p1, k1*
Round 13 – *k12, p1*
These 13 rounds can be summarized in these steps:
1. Knit until you reach a stitch that was purled on the previous round
2. Knit the stitch directly over the stitch that was purled on the previous round, then purl the next stitch
3. Continue until the desired length is reached
Continue working in this manner until hat measures
5″ (6″, 7.5″) from brim, ending on any round.
Crown Shaping
Decreases are worked into the purl swirl pattern in the place of the purl stitches.
Continuing where you left off, decrease as follows:
1. Knit until you reach a stitch that was purled on the previous round
2. Knit the stitch directly over the stitch that was purled on the previous round
3. Instead of purling the next stitch as you did with the body, decrease as follows:
sl 1 kwise, sl 1 pwise, sl both sts back to LHN, p2tog
4. Each round results in 4 (5, 6) decreases. Repeat until 16 (19, 24) sts remain
Finishing
Snip yarn, leaving a long tail. Draw through remaining stitches, pull tight, and secure.
Weave in ends. Block if desired.
Download Pattern PDF | Add to Ravelry Queue | Pin on Pinterest

3 Comments
Tara
Hi there! Do u do all types of knitting? My gram pasted away 9 years ago and left 3 undone blankets. She made them for all of us but my last 2 nieces and nephew (my sister’s babies) never recieved one bc theu were born after she passed. I want to have them finished for my sister for chrismas 2021. Let me know if you can help. Thank you!
Holly
Hi Tara –
I can certainly try! Are you planning to learn how to knit and finish the blankets or are you looking for someone else to finish them?
Take care,
Holly
Pingback: