
Eclipse Tank Top [Knitting Pattern]
Working on most knitting patterns is a joy. I hate to admit it, but creating the Eclipse Tank Top knitting pattern was a chore!
Typically I don’t share too much about the process of crafting a knitting pattern, but it usually starts with an idea of what I want to make. I visualize it, then sketch out the basic look. Then I work backwards, trying to figure out how to construct it. I make notes on stitches and shaping, then completely flesh out the ideas and math involved.
Unless I’ve seen a yarn and been struck with sudden inspiration, it’s the last choice I make in the process. I find the yarn and start a sample. It almost never fits perfectly, so I have to make some changes. More math. Then I work the sample and adjust the pattern as I go, making notes along the way.
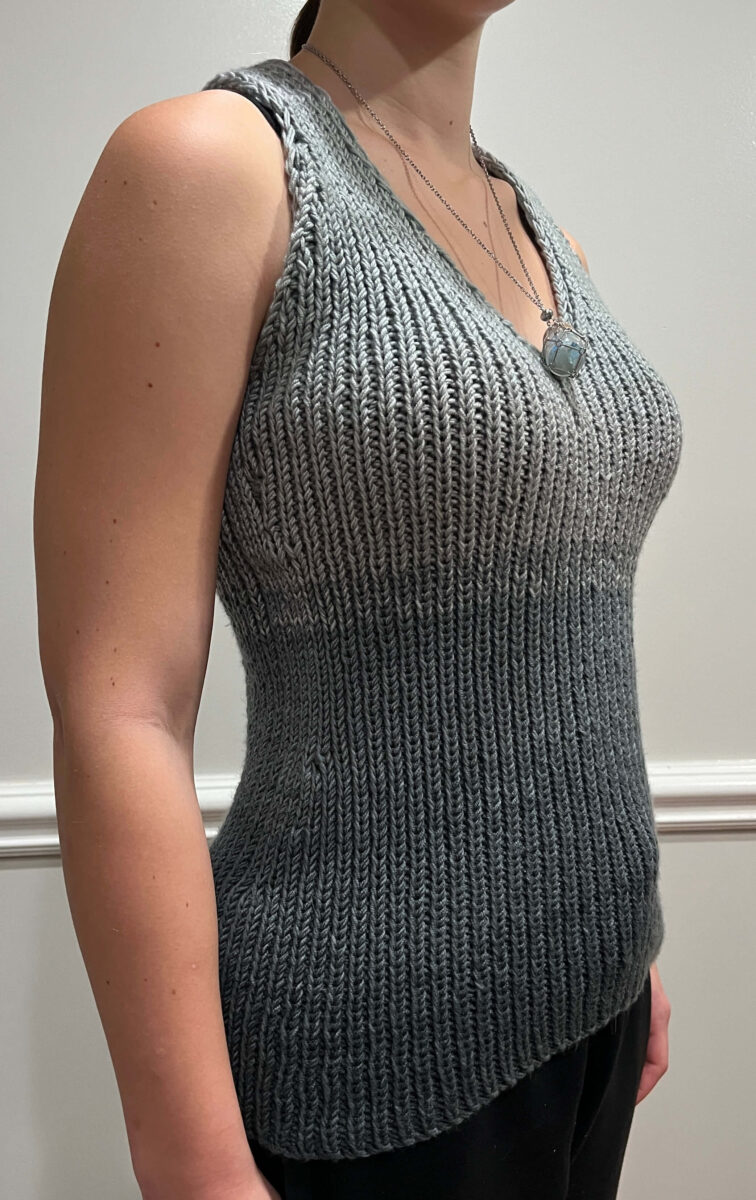
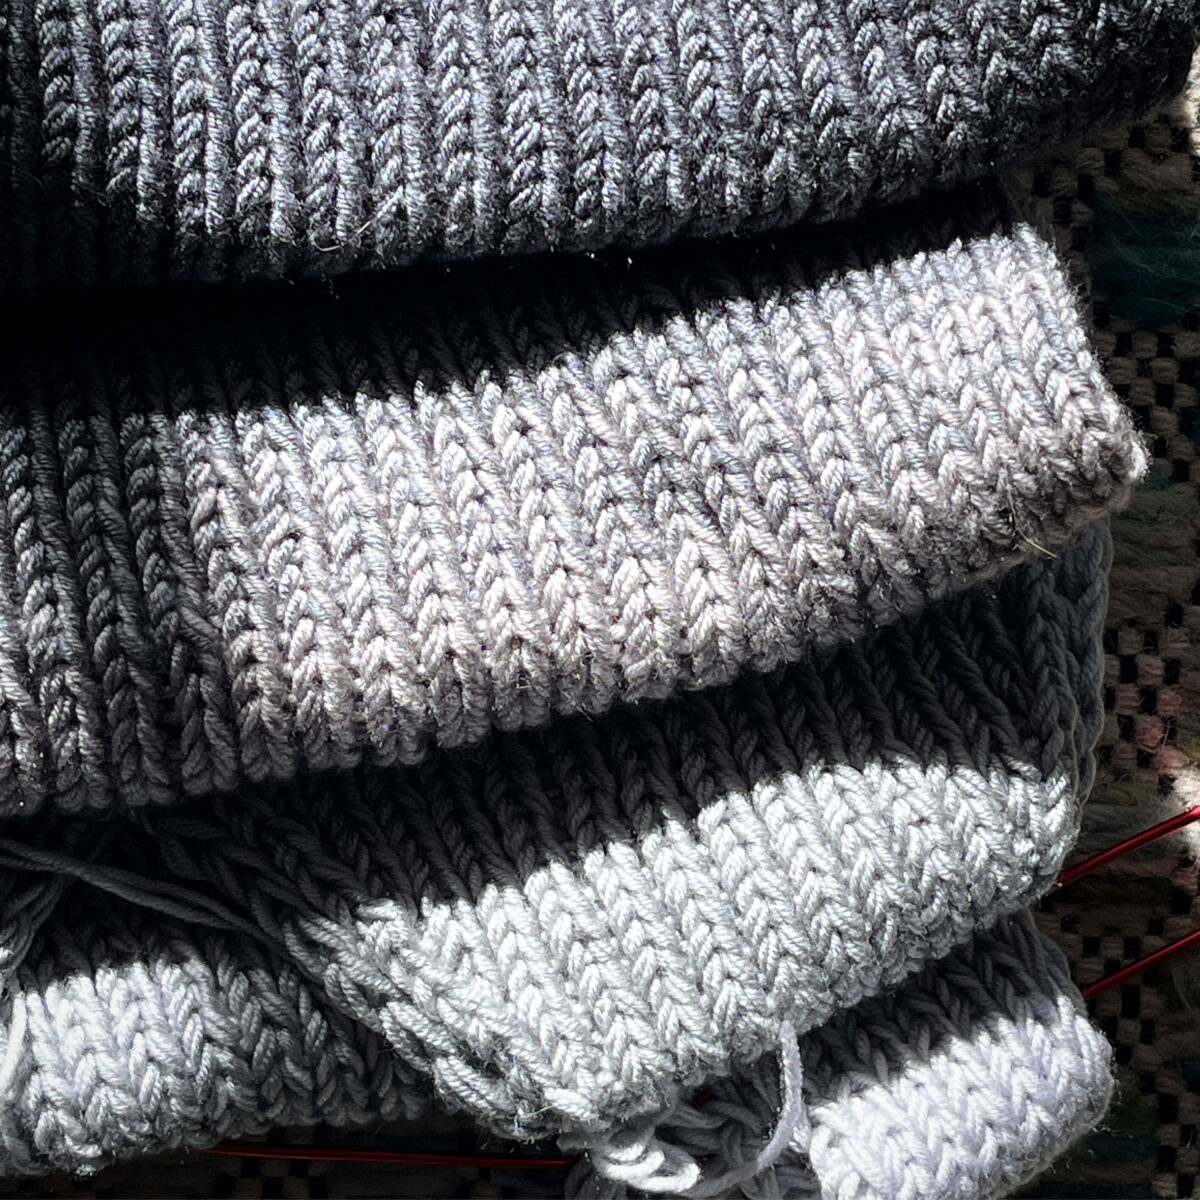
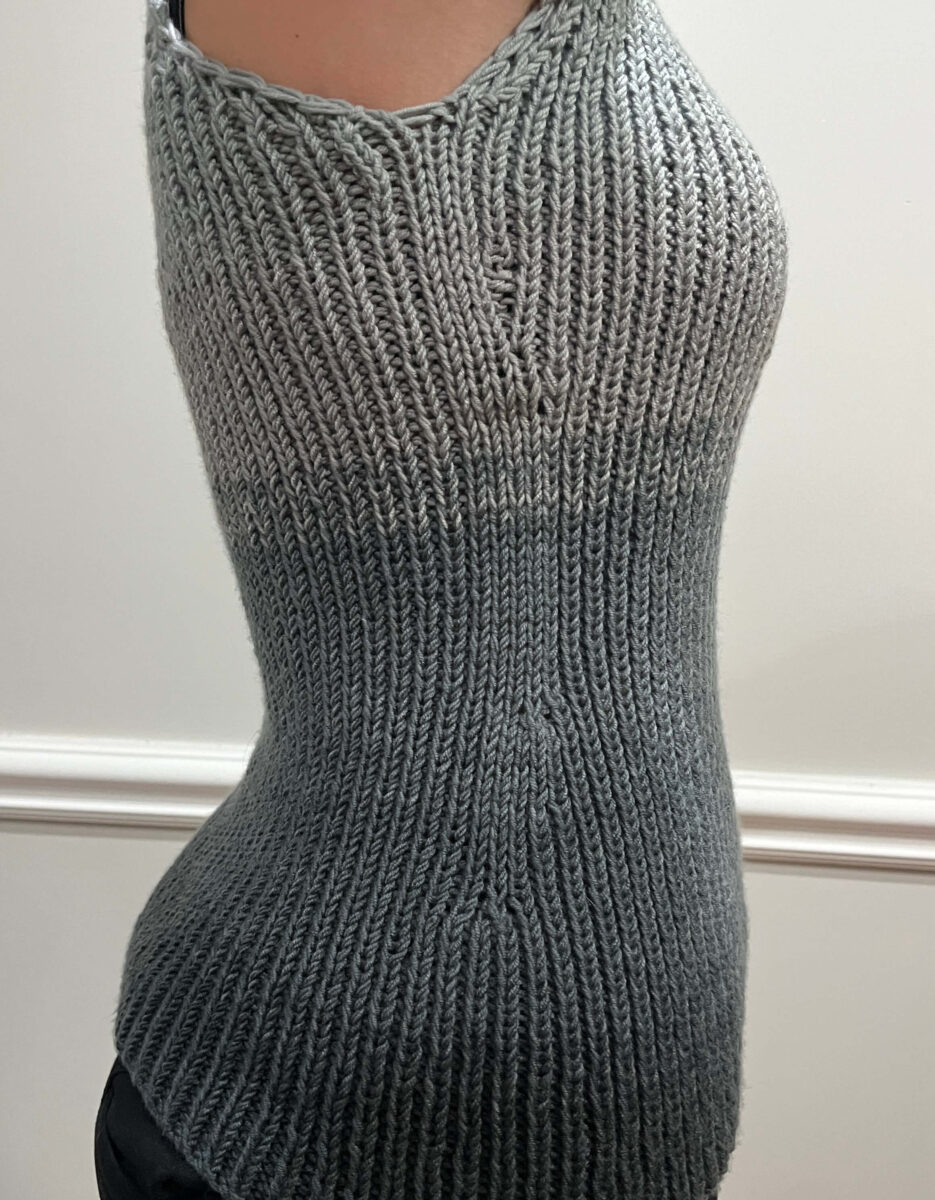
My inspiration for the Eclipse Tank Top is the upcoming total solar eclipse. I imagined a tank top that transitioned from dark to light, showcasing several greys in between. I used ribbing to help with shaping since k1p1 ribbing has cling and a generous stretch.
All in all, I’m pleased with the look and feel of this knitted tank top. Decreasing and increasing with ribbing was a challenge I enjoyed, the gradient effect worked as I had planned, and it looks great on my daughter.
What I did not enjoy was actually knitting the Eclipse Tank Top!
It’s particularly heartbreaking that knitting this was a chore because knitting is my favorite part of creating patterns. It’s a chance to see an idea come to life in your hands!
With this particular pattern, though, I felt the k1p1 ribbing was too much. It is nice in small batches, but over a project of this size, it became daunting, almost to the point where it was burdensome!
Still, I put in the work to create this pattern, so here it is, quite loosely. I did not work out additional sizes or test the pattern. It is not available in PDF format.
Eclipse Tank Top
Knitting Pattern
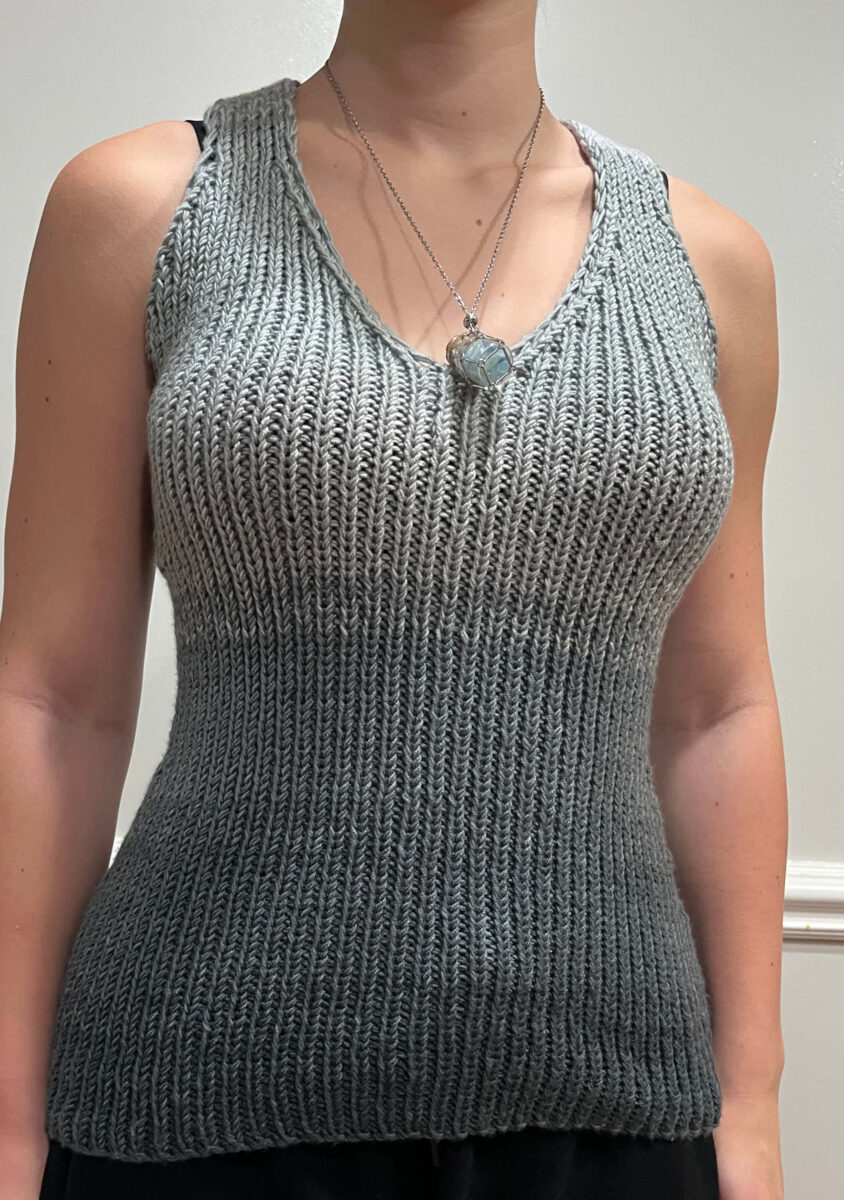
The Eclipse Tank Top is a ribbed tank top that features a gradual color change from light to dark. The tank top is warm, fitted, and comfortable.
This pattern was inspired by the 2024 total solar eclipse.
The Eclipse Tank Top is worked in the round from the bottom up. This pattern features ribbing, increases, and decreases and is suitable for an advanced beginner.
To view our terms of use for all knitting and crochet patterns, see our Terms of Service.
Sizes
One size (L/XL) – 30″ bust, 24.5″ length, unstretched
Materials
Yarn:
2 skeins of Hobbii Butterfly yarn in 05 Gray Pansy
Needles:
US #9/5.50 mm needles (36″ circular or longer recommended)
Notions:
finishing needle
Notes
Gauge:
19 sts x 22 rows = 4″ x 4″
in k1p1 ribbing, unstretched
with yarn held doubled
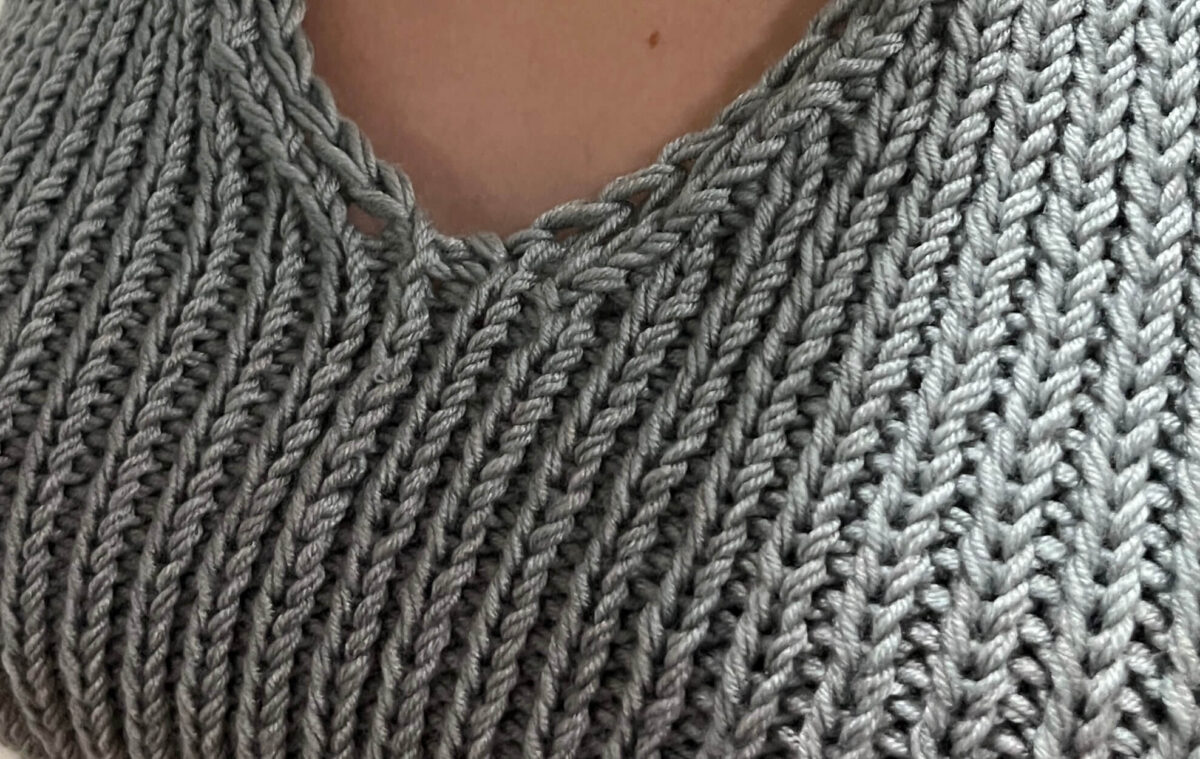
The Eclipse Tank Top is worked in one piece from the bottom up. It is worked in the round, then the body is divided for the straps and back, which are worked back and forth.
Start with the dark end (exterior) of both skeins of yarn and hold them together. Before you begin, snip off 3-5 yards from one skein. This ensures a gradual change in colorway.
Abbreviations
BO – bind off
CO – cast on
k – knit
m – marker
p – purl
pm – place marker
s2kp2 –
st(s) – stitch(es)
wyib – with yarn in back
wyif – with yarn in front
Setup
Using yarn drawn from the center of one cake, draw out approximately 10 yards of yarn. Snip and discard. This helps to stagger the color changes in the gradient between skeins and will result in a more gradual color change.
Draw yarn from the center of each cake and, working with both strands held together, CO 166 sts.
Join for working in the round, taking care not to twist.
Setup Row: pm, work in k1p1 ribbing for 80 sts, pm, work to end in k1p1 ribbing
The 80 stitches isolated by markers form the front.
Body
Work even in k1p1 ribbing until work measures 6″ from cast-on edge.
Note that decrease rounds will disrupt the k1p1 pattern. Work as indicated below and, when working the stitches on subsequent rows, work all stitches as they present.
Begin decreases for waist shaping as follows:
Round 1 – *k1, k2tog, work until 3 sts before m, ssk, k1, sl m* twice (4 stitches decreased)
Round 2 – *s2kp2, work to 3 stitches before m, s2kp2, sl m* twice (8 stitches decreased)
Work 6 rounds even.
Repeat these 8 rounds twice more. 130 sts remain.
Work even until work measures 13″ from cast-on edge. Check for fit.
Bust Shaping
Begin increasing for bust as follows:
Round 1 – k1, m1, work until 1 st before m, m1, k1, slip m, work even till end of round (2 stitches increased)
Round 2 – work even
Round 3 – k1, m1, work until 1 st before m, m1, k1, slip m, work even till end of round (2 stitches increased)
Work 3 rounds even.
Repeat Rounds 1 to 3 once more. 138 sts on needles.
Work 2 rounds even.
Working back and forth on the front only, shape for front as follows:
Rows 1 and 2 – Work even until 1 st before m, turn
Rows 3 and 4 – Work even until 2 sts before m, turn
Rows 5 and 6 – Work even until 3 sts before m, turn
Rows 7 and 8 – Work even until 4 sts before m, turn
Work the entire round evenly for 4″ more. Check for fit.
Straps & Back
Divide front of work into two even sections:
Count next 38 sts for left front. Leave on working needle.
Place the next 38 sts on stitch holder or scrap yarn for right front.
Place the remaining sts on stitch holder or scrap yarn for back.
Remove all markers.
The left front, right front, and back will be worked back and forth individually.
Left Front
Row 1 – ssk, yo, ssk, work even to last 4 sts, k2tog, yo, k2tog
Row 2 – sl 1, work even to last st, sl 1
Repeat these 2 rows until 14 sts remain.
Work even, reestablishing k1p1 and slipping the first and last st of every WS row, until strap measures 14″ long. Check for fit.
Place live stitches on stitch holder or scrap yarn.
Right Front
Work as left front.
Back
Row 1 – ssk, k1, p2tog, work even until 5 sts remain, ssk, k1, k2tog
Row 2 – sl 1, work even until 1 st remains, sl 1
Repeat these 2 rows until 28 sts remain.
Finishing
Check for fit before proceeding. Add length to straps as necessary, then graft together the live stitches of the left front to the left half of the back and right front to the right half of the back.
Weave in ends.
Block lightly if desired.


One Comment
Pingback: