


Creating mosaic tile flowerpots is a perfect craft to welcome spring… and to protect our flowers from deer! We already had all of these supplies at home, too.
As each step requires drying time, this can easily become a multi-day project. Keep this in mind when planning.


Materials
Our terra cotta pots came from the front porch where they had developed quite a bit of patina. After saving the soil, I found they cleaned up well in the dishwasher on the top rack and gentlest cycle.
Just be sure to let them dry all the way before you start painting or gluing. (This took nearly 24 hours for ours!)
We had air-dry clay on hand, but if you don’t, use this recipe to make some at home.
Acrylic paints show up well on air-dry clay, but you can also use tempera paints. Watercolor paints create a subtle washed effect, but use caution when painting with them as they can over-wet the clay. (Out of paint? Use markers or nail polish!)
Use a glue that’s compatible with your pot; we used craft glue, but any glue that works with porous surfaces will work for terra cotta.
Be sure to use a sealant on the artwork before adding your plants or placing outdoors!
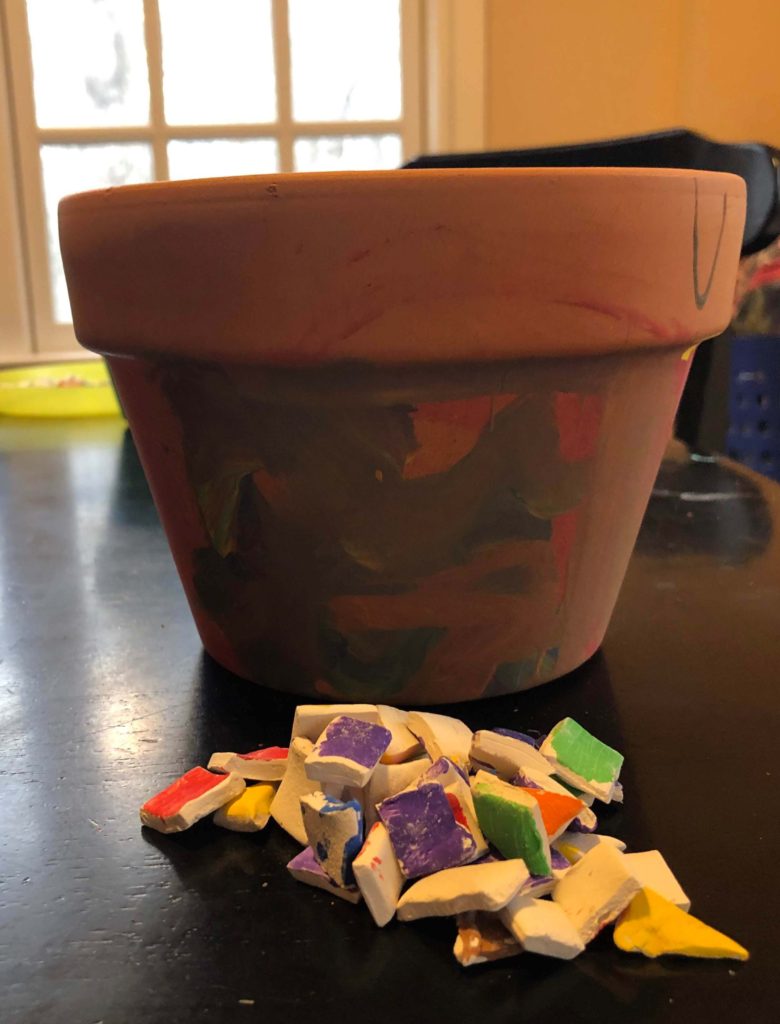
Prepare Your Mosaic Tiles
It can be difficult to estimate how many tiles you’ll need without an aid. We made a loop around our pots with freezer paper, then cut it to size. We used that as a guide, adding about 10% for breakage or mistakes.
Roll out the clay carefully, then cut into long strips. Cut across the strips to form squares. These are your tiles.


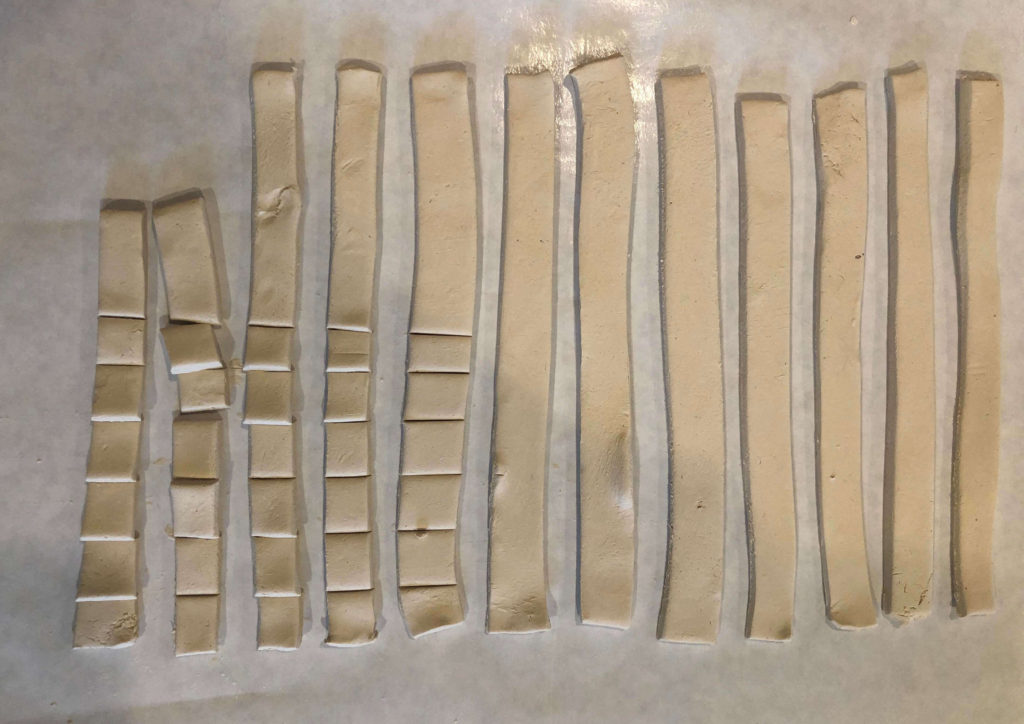
The tiles don’t have to be perfectly even; some difference adds interest and beauty. You should try to keep them as flat as possible, though, so they adhere easily.
We cut some of our square tiles in half to make triangles, too.

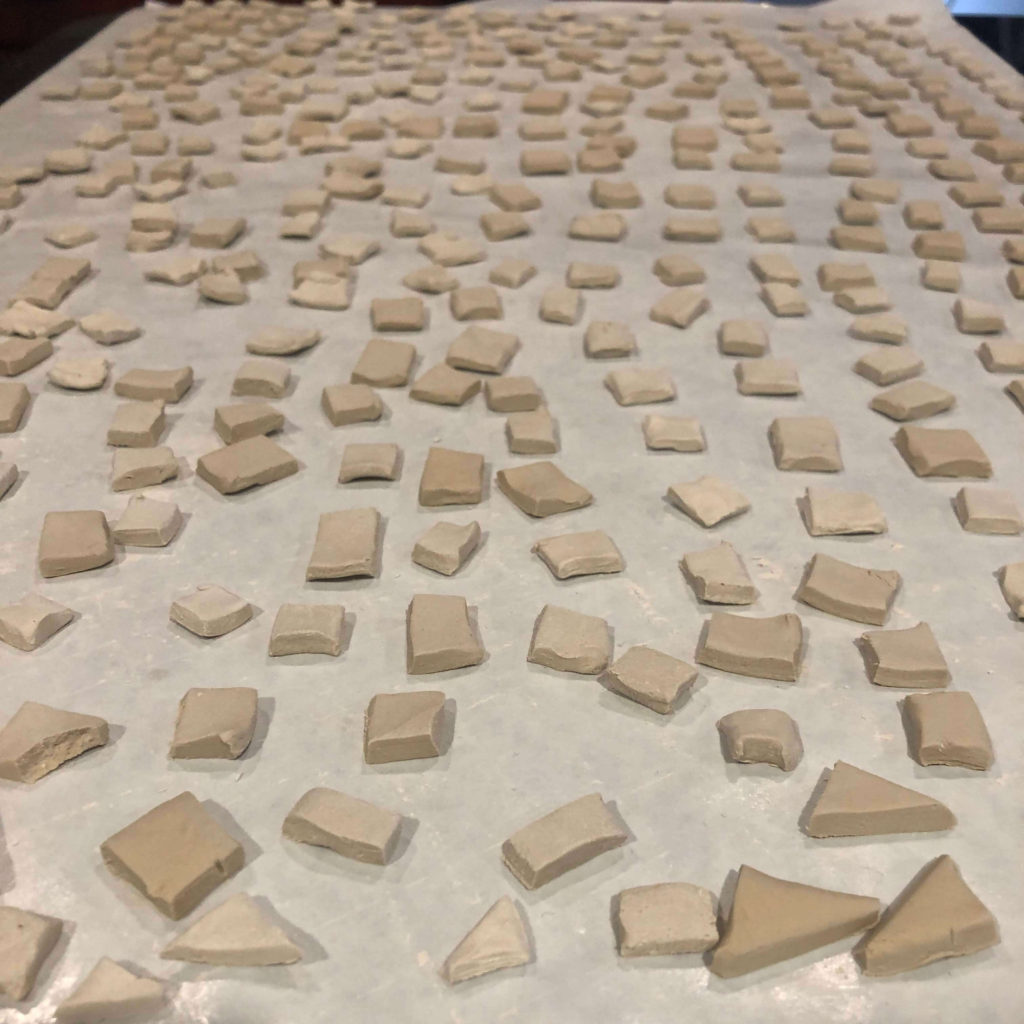
Allow the clay tiles to dry overnight.
Paint Your Mosaic Tiles
Estimate how many tiles you’ll need in each color. We used the same +10% rule here.

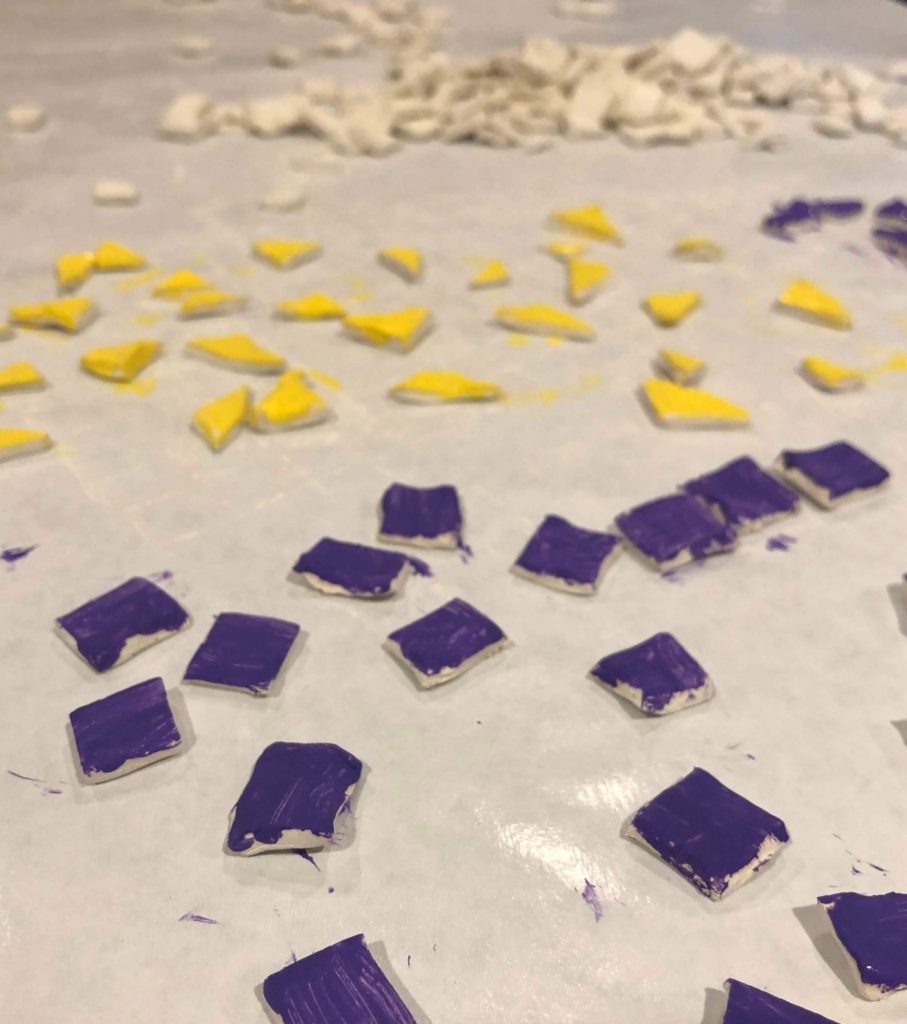
After painting your tiles, allow the paint to dry completely.
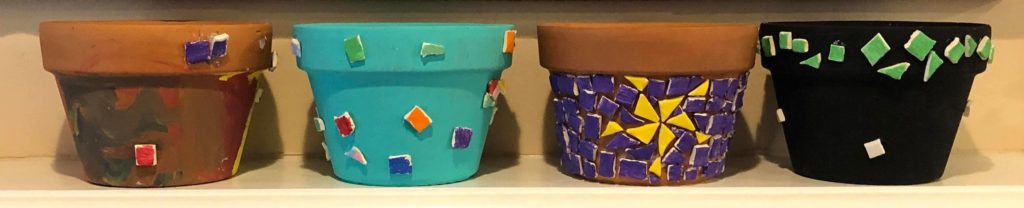
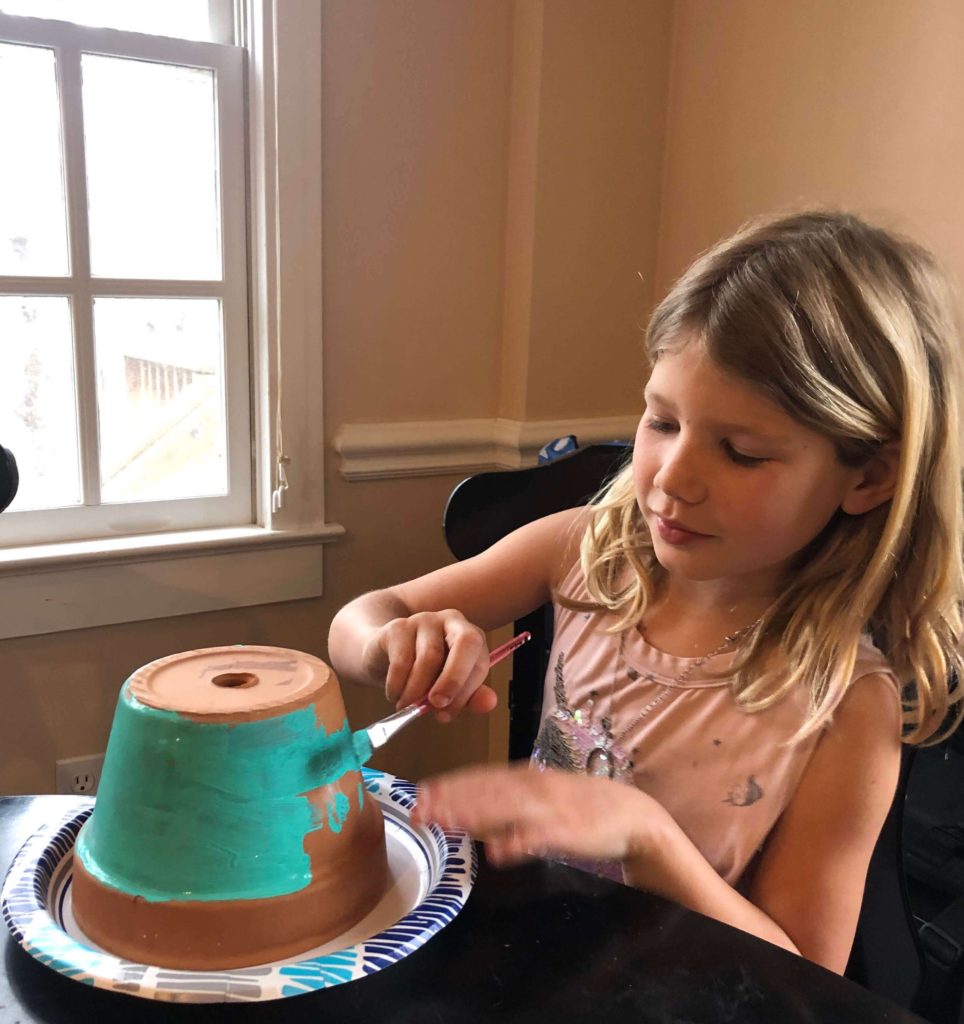
You may also choose to paint your pot, depending on the design. Now’s the best time for that.

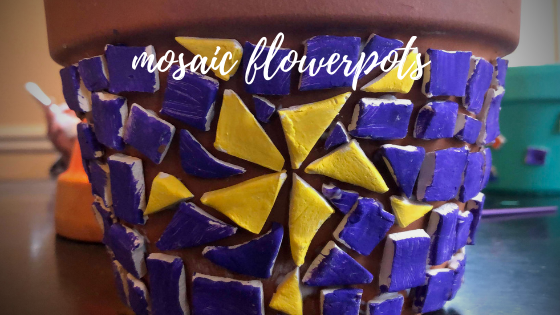
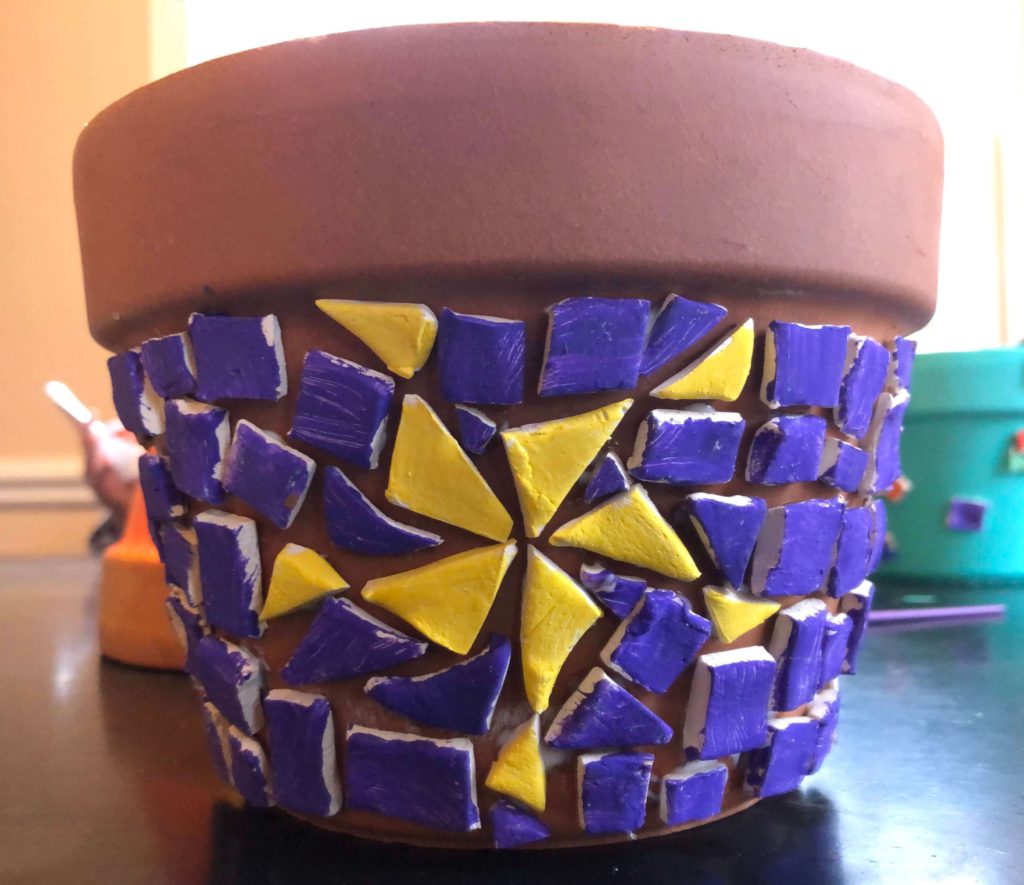
Create Your Mosaic Tile Flowerpots
Glue your tiles on your pot in the design of your choice. It might help to lay out your design beforehand.

You can use a cheap paintbrush to apply glue to each tile or dab it directly from the nozzle of the bottle. With craft glue and clay, we found that less is more.
Once you’re sure it’s dry (so much drying…), apply sealant to the entire exterior of the pot. We prefer a matte finish.
Again, allow it to dry completely!

Now you’re ready to plant!
